Showing posts with label Cake. Show all posts

11.25.2014

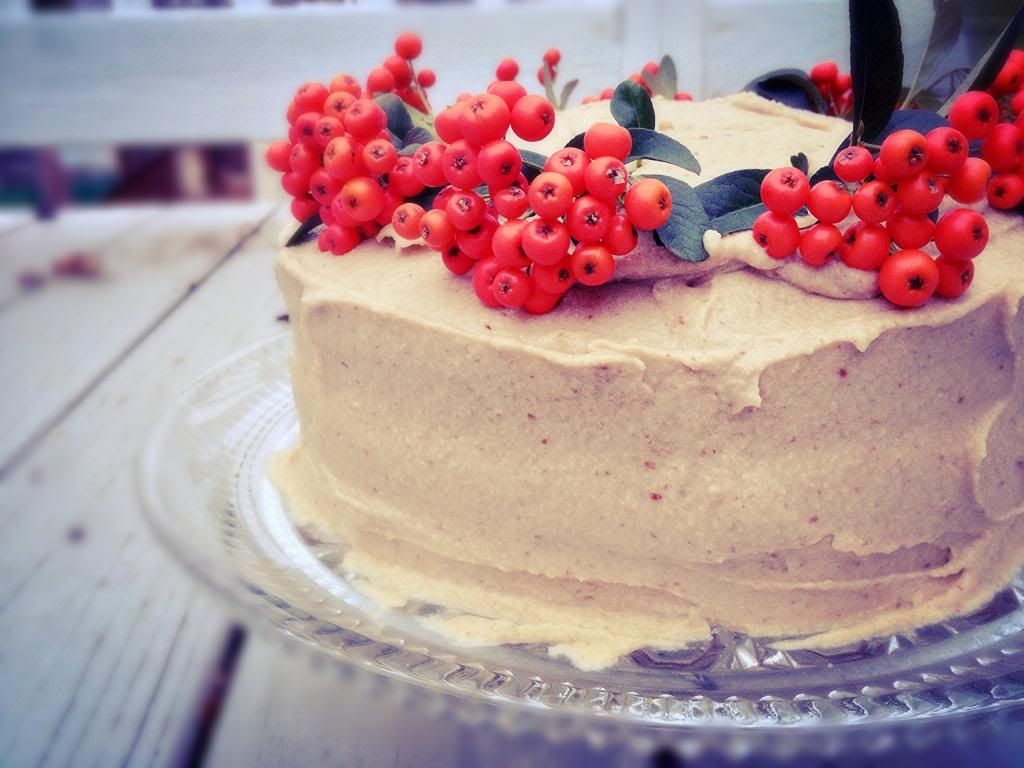
Pumpkin Spice Cake with Cashew Caramel Icing


***I did this post a little over a year ago for the NY-based organic meal delivery company, Sakara Life, but thought with the holidays at our doorstep, some of you might be looking for some "healthified" menu options. Hopefully I can once again keep up with blogging. I really do like it, I swear!***

It was my birthday this past Tuesday (no it wasn't), and after a weekend spent celebrating in the city, I welcomed a relaxed night in and a big bowl of pasta. Ever since I was little, my birthdays have been spent at my house with my closest friends and family and an Italian inspired meal. Keeping this tradition alive allows me to scam my way into two birthday parties: one spent over-drinking, and the other overeating. Birthdays are for splurging. I spend the remaining 363 days of the year binging on green juice and superfoods, so I really don't feel guilty. Besides, splurging for me usually means a little organic cheese or a vegan dessert. When I was younger my annual birthday meal was my mom's baked ziti. It has since grown up into my sister's penne a la vodka, and I really can't imagine it growing into anything else. Her vodka sauce is hands-down my favorite thing to eat. This year we served it over fusilli pasta and also as a bed for roasted fennel stuffed mushrooms (also amazing). I made the salad - a kale, currant, and pecorino mix, and also the cake. Yes, it's a little sad that I made my own birthday cake, but I really can't think of who else I'd trust with the challenge. Inspired by my favorite season, I went with a pumpkin spiced cake and a cashew date frosting. I'm always a little nervous when it comes to vegan baking, which is why my usual desserts are typically raw, but every birthday deserves a proper cake, especially when it's being served to non-vegans. Thankfully it was a big success. The cake was perfectly fluffy and moist, but the frosting really stole the show. I made the cake the night before and wrapped them in plastic on my counter. The frosting I made the next morning, and let sit in my fridge to thicken up a little until dinner. After soaking the cashews overnight, the rest of the frosting came together quickly with the help of a quality blender. I knew I'd love it as I added each ingredient to the machine. Cashews, dates, coconut milk, vanilla, and a pinch of salt blended together to create the most perfectly sweetened, caramel-like creme, without any of the unhealthy culprits in your usual confection. Cashews are the ultimate when it comes to creating nutritious desserts. They contain the same heart-healthy unsaturated fat as olive oil, and are a great source of copper and manganese. The soaking also allows for easier digestion, and basically a healthy substitute for the butter usually used in frostings. A few too many spoonfuls were sacrificed before landing on the target. And as a self-declared frosting lover, I obviously had to make way more than was required for an 8-inch cake. The stellar ingredient list is all the more reason to have an extra scoop of frosting and a slice of cake for breakfast, which is exactly what I did every single day this week. The frosting also made for a delicious fruit dip, a faux yogurt in a breakfast parfait, and the obvious decision for a spoonful every time I opened the fridge.

Pumpkin Spice Cake
Makes one 8-inch double layer cake

2 1/4 cups light spelt flour
3/4 cup coconut sugar
2 teaspoons baking powder
1/2 teaspoon baking soda
1/2 teaspoon salt
1 teaspoon cinnamon
1/4 teaspoon nutmeg
1/8 teaspoon allspice
a few pinches of ground cloves
3/4 cup pumpkin puree (100% pumpkin)
1 cup vanilla almond milk
2 teaspoons vanilla extract
1/4 cup maple syrup
1 tablespoon freshly squeezed lemon juice
1/4 cup coconut oil

Preheat the oven to 350°F. Lightly oil two 8-inch round cake pans, and line the bottom of each with parchment paper. Lightly oil the parchment paper (I use coconut oil spray), and dust with some extra spelt flour.

In a large bowl, whisk together the flour, sugar, salt, spices, baking powder and baking soda.

In a smaller bowl, whisk together the pumpkin puree, almond milk, vanilla, maple syrup, and lemon juice. Add the wet ingredients to the dry, along with the coconut oil, and whisk just until combined. Pour the batter evenly into the prepared pans. Bake for 25-30 minutes, or until a toothpick inserted into the center comes out clean. Remove from the oven, and let cool in pans on a cooling rack for 30 minutes. Remove the cake from the pans, peel off the parchment, and cool completely directly on the rack. Frost immediately, or wrap in plastic overnight.

Cashew Caramel Icing
Cut this recipe in half if you don't want to eat frosting all week (is that a real thing?)

2 cups cashews, soaked overnight
16 medjool dates
1 1/2 cans coconut milk
2 teaspoons vanilla extract
1/2 teaspoon pink himalayan salt

Process everything in a blender or food processor until smooth. Refrigerate for a few hours if desired.

6.23.2009

Vanilla Layer Cake with Bittersweet Buttercream

Vanilla Layer Cake with Bittersweet Buttercream

Did You Know? The history of birthday cakes come from the Greeks, who would take their round, moon-shaped cakes to the temple of Artemis-the Goddess of Moon. The tradition of placing lit candles on these cakes signified the glowing moon, and many believed the smoke of the candles carried their wishes and prayers to the Gods who lived in the skies above.

It was my Mom's birthday last month, so I went with the usual 'I'll-cook-for-you-since-I-have-no-money-to-buy-you-anything' present. A yellow cake with chocolate frosting is what she requested, so that's exactly what I made, jazzed up with a little heath bar of course. I love baking for birthdays, and cooking up dishes that are unique to the tastes of who they're intended for. For my mom, I went with the classic 1,2,3,4 cake. I mean it's all over the web for a reason - it's good, really good. The whipped buttercream frosting on Smitten sounded amazing, so I topped it off with that, and sprinkled some toffee bits all over the top.

The day I made this was unbelievably hot and humid, so I had a hard time keeping the frosting from melting. It wasn't a problem for too long, as we ate our fair share of cake pretty quickly, and shared the rest with our neighbors. If you're tempted to refrigerate this cake, I strongly urge you not to. I put a few pieces in the fridge overnight, and they dried out terribly. I later read that butter cakes should never be chilled for that specific reason. Other than that, this cake will definitely be one of my go-to recipes. Next up will be a cupcake version for sure.


Vanilla Layer Cake with Bittersweet Buttercream

In other news, my bakery has been pretty successful these past few weeks, and me and Chris couldn't be more excited. We have an event at Felt Night Club in Boston on July 8th, so we're really looking forward to that - a lot of great advertising. They host girl's nights every Wednesday, and the 8th is chocolate-themed. I've already got our menu planned out, but if you live in the area, I'd love to meet some of you, so contact Felt for all the details. I've also set up a Facebook page for Sweet Inspirations, so check that out, and make sure you become a fan! We can use all the support we can get. I've put a Facebook widget on the bottom of this page, so click over from here or there. Thanks!


Vanilla Layer Cake with Bittersweet Buttercream
Adapted from Smitten Kitchen

1 cup (2 sticks) butter, softened
2 cups sugar
4 eggs
3 cups sifted self-rising flour
1 cup milk
1 teaspoon pure vanilla extract
Bittersweet Buttercream, recipe follows


Preheat oven to 350°F. Grease and flour three 9-inch round cake pans*, set aside.

Using an electric mixer, cream butter until fluffy. Add sugar and continue to cream well for 6 to 8 minutes. Add eggs 1 at a time, beating well after each addition. Add flour and milk alternately to creamed mixture, beginning and ending with flour. Add vanilla and continue to beat until just mixed.

Divide batter equally among prepared pans. Level batter in each pan by holding pan 3 or 4-inches above counter, then dropping flat onto counter. Do this several times to release air bubbles and assure you of a more level cake. Bake for 25 to 30 minutes or until a tester or toothpick inserted into the center comes out clean.

*You'll notice only two layers in my cake. I used two 9-inch pans, along with 5 or so cupcakes.


Bittersweet Buttercream
Adapted from Smitten Kitchen

10 ounces bittersweet chocolate
1 1/2 cups heavy cream
1 1/2 sticks unsalted butter, softened
2 cups confectioners' sugar


Melt the chocolate with the cream in a double boiler or metal bowl set over a pan of simmering water. Whisk to blend well. Remove from heat and let stand, whisking occasionally, until the chocolate mixture thickens to the consistency of mayonnaise.

Place the butter in the bowl of an electric mixer, and on medium speed, whip the butter until light and fluffy. Add the chocolate cream and whip until lighter in color and somewhat stiff, about three minutes. Add in the confectioners sugar, whip again, and continue to add until you have reached your desired consistency.


Vanilla Layer Cake with Bittersweet Buttercream

5.17.2009

Pomegranate Yogurt Cake

Pomegranate Yogurt Cake

Did You Know? Pomegranates have existed for 50 to 70 million years. The plants themselves live 100 to 150 years in the wild, and 300 years or more in cultivated gardens. They bear fruit in their second or third year, and can produce 440 to 660 pounds of fruit annually.

With a huge case of POM Wonderful and some tubs of Oikos, I needed a recipe to put these ingredients to use, preferably all at once. I'd had a recipe for grapefruit yogurt cake bookmarked for some time, and with a few substitutions, I knew I could have something really great. The original recipe had mentioned that the grapefuit syrup did not thicken up as hoped, so I made sure to let the pomegranate juice reduce down for a few extra minutes; it ended up being my favorite part.

As for the cake itself, it has a wonderful crumb, and is super-moist. Flavorwise, it's definitely more lemon than pomegranate, but I expected that. The original recipe had praised the grapefruit-zested sugar that was incorporated, but with no rind to zest from a pomegranate, I opted for a lemon instead, and threw in a tablespoon of pomegranate juice for good measure.


Lemon Sugar

Pomegranate Yogurt Cake

Pomegranate Yogurt Cake

Pomegranate Yogurt Cake

Pomegranate Yogurt Cake
Adapted from Joy the Baker

2 cups all-purpose flour
1 Tablespoon baking powder
1/4 teaspoon salt
2 eggs
3/4 cup granulated sugar
1 cup Greek yogurt
1/3 cup grapeseed oil
1 tablespoon lemon zest
1/2 cup pomegranate juice, plus one tablespoon
1 teaspoon vanilla extract
3 Tablespoons powdered sugar

Preheat your oven to 350 degrees F. Grease and flour a bundt pan, and set aside.

In a medium bowl, whisk together the flour, baking powder and salt to blend.

On a clean surface, or in a large bowl, combine the granulated sugar and zest. With the back of a spoon or a flexible bench knife, rub the lemon zest into the sugar. The essential oils will release into the sugar creating a wonderfully fragrant lemon-sugar.

In a large bowl, beat the eggs and lemon-sugar until the eggs are thick and pale yellow. Add the yogurt, oil, one tablespoon of pomegranate juice, and vanilla extract. Stir well to combine. Add the flour mixture and stir to combine.

Pour the batter into the prepared pan, smoothing the top with a rubber spatula. Bake for 30-40 minutes, or until the top is golden brown and a wooden skewer comes out clean when inserted near the center. Place the pan on a wire rack for 10 minutes to cool. Run a knife around the edge of the pan to loosen the cake, and cool completely on the wire rack.

In a small saucepan, combine the powdered sugar and the remaining 1/2 cup of pomegranate juice and bring to a boil Reduce the heat to a simmer and cook, stirring, for 10-15 minutes, or until the glaze is slightly thickened. Remove from heat.

To finish, pierce the cake all over the top with a skewer and pour the warm pomegranate syrup slowly over the cake.

Store at room temperature, wrapped well, for 2 days.

Pomegranate Yogurt Cake

5.13.2009

Coconut Layer Cake

Coconut Layer Cake

Did You Know? Falling coconuts kill 150 people every year - 10 times the number of people killed by sharks.

Not having a job leaves me with little money of my own to buy gifts for just about anyone, so when the occasion arises, I turn to baking. There's nothing like creating something special to present to your friends and family, especially when that someone is your mom. My mom is the best, and always by my side in the kitchen, cleaning every last pan that I make a mess of. She's great at rinsing and chopping, and always makes sure our kitchen is stocked. No request is ever too large. She's the ultimate soux chef.

My sister and I always joke around that we could never live with any other mother besides our own. No one would put up with us like she does, and no one would do as much as our mom does. She makes it really hard to ever want to get a place of my own. Why move out, when every last detail of my life is taken care of here? I guess to be a little more self-sufficient, but I've got time for crazy stuff like that. So in honor of my mom, and all the awesome things she does for my family, I made her a cake (even trade right?); A coconut layer cake, her favorite.


Coconut Layer Cake

Coconut Layer Cake

Coconut Layer Cake

Mother's Day was held at my house this year, and my aunt, uncle, and grandparents came over for a late lunch to celebrate the occasion. My mom made the meal, and I finished it off with this cake. I'm not a huge fan of shredded coconut, and cream cheese is definitely not my thing, so I opted out of tasting this one. But from the reactions of all of our guests, along with the multiple servings, I'd say it was a huge success. My mom loved it too, so that's all that really mattered. I hope you all enjoyed your Mother's Day, and I promise to post a little more often now that I'm done with school!

Coconut Layer Cake

Coconut Layer Cake

Coconut Layer Cake

Coconut Layer Cake
Adapted from Bon Appetit via Epicurious
I sliced each cake into 2, for a total of 4 layers. The recipe below is for a basic 2 layer cake.


2 3/4 cups all purpose flour
1 teaspoon baking powder
1/2 teaspoon baking soda
1/2 teaspoon salt
1 3/4 cups sugar
1 cup (2 sticks) unsalted butter, room temperature
1 cup canned sweetened cream of coconut (such as Coco Lépez)*
4 large eggs, separated
1 teaspoon vanilla extract
1 teaspoon coconut extract
1 cup buttermilk
Coconut Cream Cheese Frosting (recipe below)*

Preheat oven to 350°F. Butter and flour two 9-inch-diameter cake pans with 2-inch-high sides (I lined mine with parchment paper as well). Whisk flour, baking powder, baking soda and 1/2 teaspoon salt in medium bowl to blend. Using electric mixer, beat sugar, butter and sweetened cream of coconut in large bowl until fluffy. Beat in egg yolks and vanilla and coconut extracts. On low speed, beat in dry ingredients and then buttermilk, each just until blended.

Using clean dry beaters, beat egg whites with pinch of salt in another large bowl until stiff but not dry. Fold beaten egg whites into batter.

Divide cake batter between prepared pans. Bake cakes until tester inserted into center comes out clean, about 45 minutes. Cool cakes in pans on rack 10 minutes. Run small sharp knife around pan sides to loosen cakes. Turn cakes out onto racks and cool completely.

Place 1 cake layer on cake plate. Spread 1 cup Cream Cheese Frosting over cake layer. Sprinkle 1 cup sweetened shredded coconut over. Top with second cake layer. Spread remaining frosting over top and sides of cake. Sprinkle remaining coconut over cake, gently pressing into sides to adhere.

Coconut Layer Cake can be prepared up to 1 day ahead. Cover with plastic wrap and refrigerate. Let stand at room temperature 2 hours before serving.

Coconut Cream Cheese Frosting
Adapted from Ina Garten

2 (8 oz) packages cream cheese, at room temperature
2 sticks unsalted butter, at room temperature
1 teaspoon coconut extract
1/2 teaspoon vanilla extract
1 pound confectioners' sugar, sifted
14 ounces sweetened shredded coconut

In the bowl of an electric mixer fitted with a paddle attachment, combine the cream cheese, butter, and the coconut and vanilla extracts on low speed. Add the confectioners' sugar and mix until just smooth (don't whip).

Coconut Layer Cake

Coconut Layer Cake

4.09.2009

Raspberry-Swirl Tea Cake

Raspberry Swirl Tea Cake

Did You Know? Red raspberries are native to Europe and have been cultivated for over 400 years, while wild red raspberries are native to North America. More than 40 varieties of raspberries were known by 1867, and today there are more than 200 known species.

Although they've been few and far between, the momentary breaks from rain and snow have brought about a craving for jam-filled cakes and whimsical, fruit-laden desserts. This recipe comes from one of my favorites, Inn Cuisine, where your hostess Sandie brings her love of all things bed and breakfast into the heart of her kitchen. Everything on her beautiful site has me daydreaming of lazy Summer weekends spent relaxing in a cozy cottage somewhere warm. If you haven't stopped by yet, I strongly encourage you to do so, if not for the pictures alone.

As the weather slowly warms, and the heavy meals hibernate until next winter, fruit takes its place on the forefront of our menus. I love putting the heavy chocolate dishes on the backburner, and whipping out the vanilla-scented crumbles and creams. Spring to me is the perfect time of year to experiment with fruity desserts. It's when your berry cravings begin to sprout, along with the first blooms of the season. The humidity isn't in full swing, and you have not yet sworn off your oven until Autumn returns. If not for the welcoming of Spring, this tea cake could at least make an appearance for your Easter Sunday brunch.


Raspberry Swirl Tea Cake

Like always, my family asked what I'd be making for them over the weekend, and I read off a list of possibilities. And like most weekends, my sister was skeptical. She doesn't like "jammy" things, and would prefer if I made something different. Of course I didn't really care, since I knew this one was not negotiable. And besides, I love proving her wrong.

Raspberry Swirl Tea Cake

Every step to making this cake was wonderful. The colors, the textures, and of course the flavors. Being a fan of anything pink, the ribbon of raspberry puree that ran through the center of the tart was beautiful. Dolloped with free-form mounds of buttery crumbles, the tea cake baked to a pale perfection in no time. I set it by the window to cool while we set off to do some errands on a gorgeous Sunday afternoon.

Raspberry Swirl Tea Cake


Raspberry-Swirl Tea Cake
Adapted from Inn Cuisine

Filling
1 (12 ounce) package frozen raspberries
1/4 cup granulated sugar
1 tablespoon cornstarch

Batter
1 & 1/4 cups all-purpose flour
1 cup whole wheat pastry flour
3/4 cup sugar
3/4 cup very cold butter, sliced into thin pats
1/2 teaspoon baking powder
1/2 teaspoon baking soda
1/8 teaspoon salt
1 egg
3/4 cup buttermilk
1/2 teaspoon vanilla extract
1/2 teaspoon almond extract


Preheat oven to 350 degrees F. Grease and flour a 10″ round tart pan with a removable bottom; set aside.

Raspberry Filling
In a heavy-bottomed saucepan, combine raspberries, sugar and cornstarch over medium heat; cook and stir until thickened and bubbly, 15-20 minutes. Remove from heat. Push raspberry mixture through a fine, mesh sieve, discarding seeds and pulp. Set filling aside to cool slightly. Alternatively, you may make ahead, store in an airtight container, and refrigerate and use within 3 days.

Tea Cake Batter
In a large mixing bowl, stir together flour and sugar. Using a pastry blender (I used a fork), cut in butter until the mixture resembles coarse crumbs. *Measure and set aside 1/2 cup of this flour-crumb mixture and reserve for crumb topping. To remaining flour mixture add baking powder, baking soda and salt; stir well to combine. Make a well in the center of flour mixture to accept the wet ingredients.

In a small mixing bowl, beat egg; stir in buttermilk, vanilla and almond extracts until just combined. Add all at once to the well you just created in the center of the flour mixture. Stir gently until just moistened; batter will be thick (do not overmix). Spread two-thirds of this batter over the bottom and up 1″ of the sides of prepared tart pan, using fingers to pat into place if necessary. Next, carefully spread the prepared raspberry filling on top of this batter. In small, irregular mounds, drop remaining batter on top of raspberry filling, spreading ever-so-gently with fingers or back of spoon if necessary. Allow mounds of batter to rest atop raspberry filling without pressing into bottom layer of batter. Sprinkle entire cake with the *reserved flour-crumb topping.

In the center of a preheated oven, bake tea cake for approximately 30-35 minutes or until a wooden toothpick inserted in center of cake comes out clean (filling will turn toothpick red). Remove tart pan from the oven and allow to cool on a wire rack for 15 minutes. Once cooled enough, remove cake from tart pan and place on cake stand or serving plate. Serve warm or at room temperature.

Raspberry Swirl Tea Cake

3.24.2009

Sydney's Double Chocolate Layer Cake

Double Chocolate Layer Cake

Did You Know? At the time Marie Antoinette uttered the infamous quotation "let them eat cake," the word "cake" did not refer to the familiar dessert item that the modern-day French call le gateau. The operative term was brioche, a flour-and-water paste that was "caked" onto the interiors of the ovens and baking pans of the professional boulangers of the era. At the end of the day, the baker would scrape the leavings from his pans and ovens and set them outside the door for the benefit of beggars and scavengers. Thus, the lady in question was simply giving practical, if somewhat flippant, advice to her poor subjects: If one cannot afford the bourgeois bread, he can avail himself of the poor man's "cake."

After a ridiculous conversation about boxed cake versus homemade, I decided to put the argument to rest, and convince my skeptical sister that homemade is the only way to go. We often joke about how off her taste buds are, prefering all the cheap, artficial foods over a nice, healhy meal. She says if she knows one thing, it's chocolate cake (something about an entire Entenmann's?). And she was positive the boxed cake was superior to anything I could bake from scratch (she's kind like that). From that statement on, I was on a mad hunt for the ultimate chocolate cake recipe.

High on the list when Googling "chocolate cake," this particular recipe had it's devoted followers. Originally featured in Gourmet, this cake must have been replicated at least a thousand times since. Declared as Deb's favorite, the layered masterpiece I was about to recreate had my approval. And since I had a skeptic on my hands, I had to buy only the finest quality ingredients. So off to Whole Foods I went. Two pounds of Callebaut later, and thirty dollars lighter (well I guess I wasn't thirty dollars lighter - thanks Mom), I was in my kitchen, and ready to conquer the chocolate cake.


Double Chocolate Layer Cake

I was surprised at the amount of hot coffee the recipe called for. I definitely didn't want a mocha-flavored cake, so that made me nervous. I couldn't have been more wrong. The coffee brought out a depth of flavor from the chocolate that I had never tasted before. And that chocolate. I will never go back to Ghirardelli again. The original called for semisweet. But I could only find bitter and milk, so I bought both and combined the two. The end result was truly amazing. Moist, tender crumbs, sandwiched by a rich chocolate ganache. The flavors were beyond complex. And the debate we had on our hands? Long forgotten.

Double Chocolate Layer Cake


Double Chocolate Layer Cake
Adapted from Epicurious via Gourmet, March 1999

Cake Layers
3 ounces fine-quality semisweet chocolate (I used milk chocolate Callebaut)
1 1/2 cups hot brewed coffee
3 cups sugar
2 1/2 cups all-purpose flour
1 1/2 cups unsweetened cocoa powder (not Dutch process)
2 teaspoons baking soda
3/4 teaspoon baking powder
1 1/4 teaspoons salt
3 large eggs
3/4 cup vegetable oil
1 1/2 cups well-shaken buttermilk
3/4 teaspoon vanilla

Ganache Frosting
1 pound fine-quality semisweet chocolate (I used a combo of milk and bittersweet Callebaut)
1 cup heavy cream
2 tablespoons sugar
2 tablespoons light corn syrup
1/2 stick (1/4 cup) unsalted butter


Make Cake Layers
Preheat oven to 300°F, and grease two 10-inch round cake pans. Line bottoms with rounds of wax paper and grease paper.

Finely chop chocolate and in a bowl combine with hot coffee. Let mixture stand, stirring occasionally, until chocolate is melted and mixture is smooth.

Into a large bowl sift together sugar, flour, cocoa powder, baking soda, baking powder, and salt. In another large bowl with an electric mixer beat eggs until thickened slightly and lemon colored (about 3 minutes with a standing mixer or 5 minutes with a hand-held mixer). Slowly add oil, buttermilk, vanilla, and melted chocolate mixture to eggs, beating until combined well. Add sugar mixture and beat on medium speed until just combined well. Divide batter between pans and bake in middle of oven until a tester inserted in center comes out clean, 1 hour to 1 hour and 10 minutes.

Cool layers completely in pans on racks. Run a thin knife around edges of pans and invert layers onto racks. Carefully remove wax paper and cool layers completely. Cake layers may be made 1 day ahead and kept, wrapped well in plastic wrap, at room temperature.

Make Frosting
Finely chop chocolate. In a 1 1/2- to 2-quart saucepan bring cream, sugar, and corn syrup to a boil over moderately low heat, whisking until sugar is dissolved. Remove pan from heat and add chocolate, whisking until chocolate is melted. Cut butter into pieces and add to frosting, whisking until smooth.

Transfer frosting to a bowl and cool, stirring occasionally, until spreadable (depending on chocolate used, it may be necessary to chill frosting to spreadable consistency).

Spread frosting between cake layers and over top and sides. Cake keeps, covered and chilled, 3 days. Bring cake to room temperature before serving.

Double Chocolate Layer Cake

12.19.2008

German Chocolate Cake

German Chocolate Cake

Did You Know? German Chocolate Cake was not brought to America by German immigrants. The cake took its name from an American with the last name of "German."

I mentioned in a recent post that I had spent a delicious Friday night baking with my mom, so I thought I would share what expactly we baked up. Trust me, this post is not for the faint of heart...

One of my favorite people to cook for is my Dad, and when he called home from work the other day to request some sort of dessert from my mom, I took over the bakers role. I'd been wanting to test out this recipe for some time (knowing it was one of my Dad's favorites) so I thought this was as good a time as any. The recipe at hand...German Chocolate Cake. A decadently rich, layer cake that is not to be taken lightly. This particular recipe incorporated moist cake layers sandwiched between a caramel-like pecan and coconut spread, all of which was drowned in an intense chocolate ganache frosting

German Chocolate Cake Baking

What set this cake apart from other chocolate cakes I had baked in the past, was the addition of melted chocolate to the cake batter, instead of the usual cocoa powder. This definately intensified the flavor, but the addition of whipped egg whites took away any doubts I had that this cake would be to dense. After giving the bowl a good lick, I watched as my cakes rose to perfection in the heat of the oven. The daunting task awaiting in the future: cutting each cake into two layers. It didn't turn out all that bad, but they were by no means cut straight across. The coconut-pecan filling did a beautiful job at masking my imperfections. Not being a huge chocolate cake fan myself, I ended up putting a nice dent into this one. Trust me, it's really good, but really filling. I found myself hunched over on the couch after eating just a small slice.

A quick note about the frosting...mine did not set up like I thought it would, so I ended up just pouring the entire bowl over the top and letting it drip down the sides. The directions say to pipe it on, but the consistency I ended up with was in no shape for piping - much too liquidy. In the end, I loved how it turned out. It may seem like a lot of ganache to be pouring on a cake, but you won't be sorry when all is said and done.

I would have posted the recipe here, but I think David's step by step instructions are perfect as is...so check it out here and see for yourself! I'll leave you with an in-your-face slice of heaven...

German Chocolate Cake

Happy Baking...Hayley

Back to Top