Showing posts with label Chocolate. Show all posts

12.21.2014

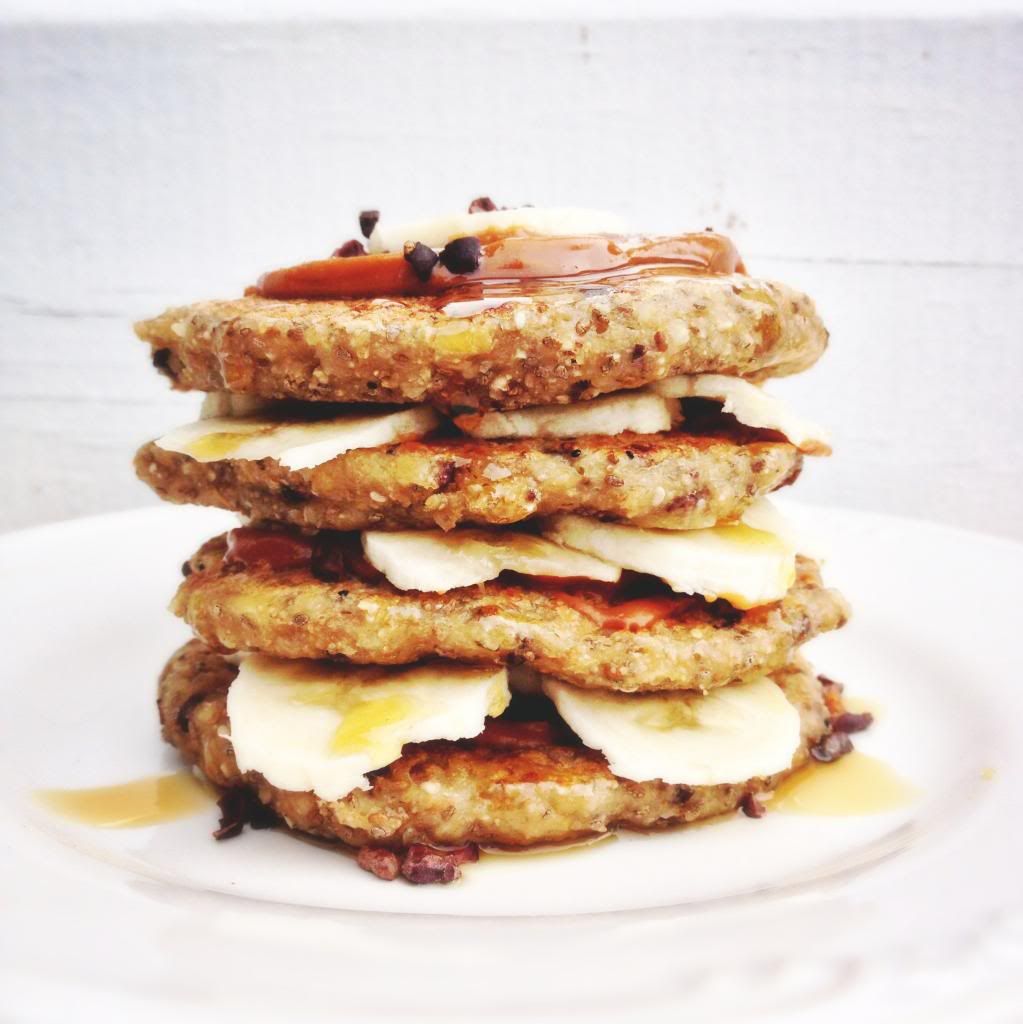
Banana Chip Chia Pancakes


**Another post I did for Sakara Life...enjoy!** 

Watching others indulge in garbage over the holidays is motivation for me to up my game in the kitchen. I'm looking for meals that taste like cookies, pies, and pancakes, but feel like salad. Is that possible? These buttermilk knockoffs definitely hit the spot. They're packed with nutritious ingredients, are super satisfying, and are perfectly reasonable lunch and dinner options. Is anything more mouth-watering than a fluffy stack of pancakes drizzled with maple syrup? Probably, but at the moment, no. Obviously my plating skills are above average when I want the pecan-pie-for-breakfast-folks to be a little jealous of what's in front of me. Here's to 2015!

Banana Chip Chia Pancakes

1/4 cup oats, ground
2 tablespoons almond meal (or protein powder)
pinch of sea salt
1 tablespoon chia seeds + 3 tablespoons water (chia egg)
1 large banana, mashed
1/2 teaspoon vanilla extract
2 tablespoons coconut water (or almond milk)
1 tablespoon cacao nibs

Stir together the chia seeds and water, and set aside to thicken. This is your egg replacement. Meanwhile, mix the ground oats, almond meal, and salt in a small bowl. Add the mashed banana, vanilla, and coconut water, and give it a stir. When the chia mixture is thick enough (5 minutes), add it to the pancake batter, along with the cacao nibs. Stir until combined.

Heat a frying pan over medium with a little coconut oil. Use a 1/4 measuring cup to make 4 small pancakes. Cook on medium/medium low for about 5-10 minutes per side. They take longer to cook than your standard pancake. When golden on either side, remove from heat, and start stacking. Layer with peanut butter, more banana slices, and maple syrup.

8.30.2013

Banana + Avocado + Cacao Smoothie Bowl


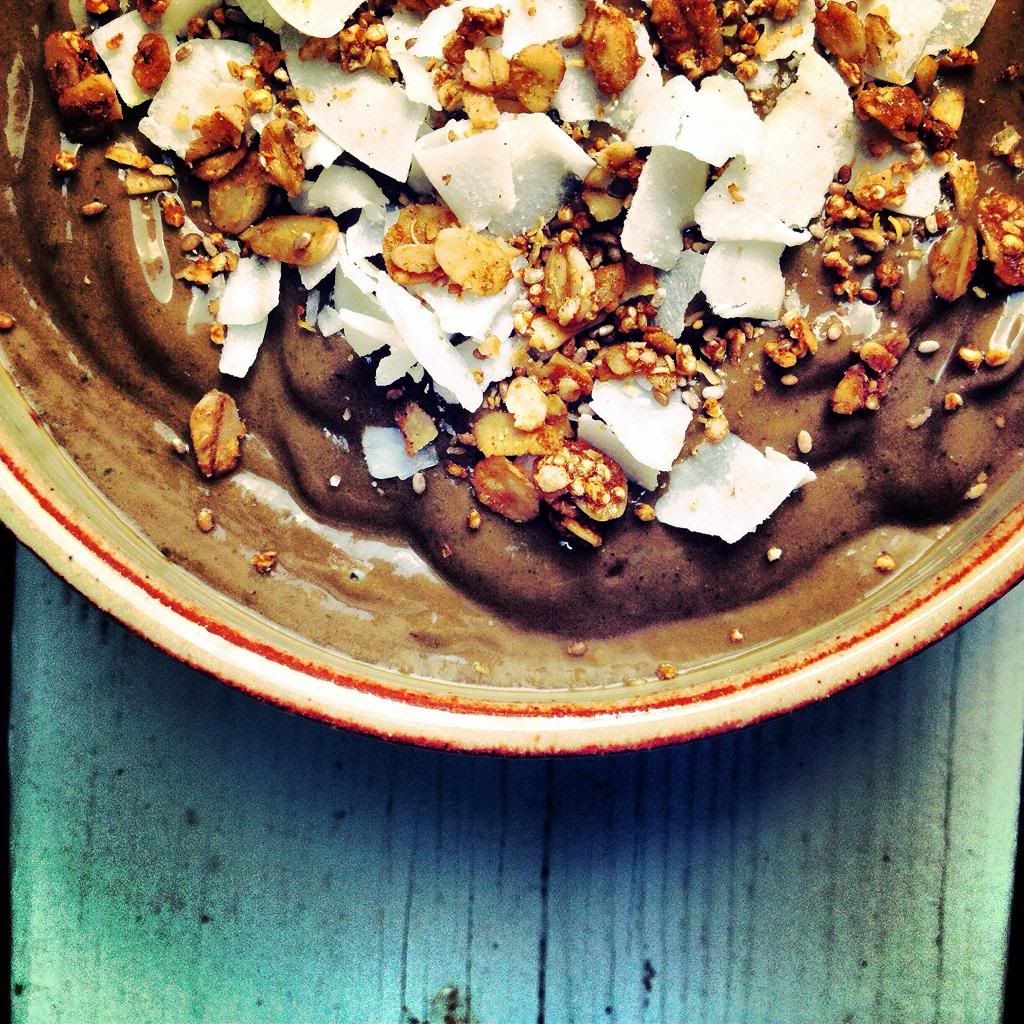
I made an avocado chocolate mousse recently (I promise to share soon), and I've been dying to recreate it again with some healthier ingredients, raw cacao powder more specifically. Avocados were used as the base, and that got me thinking as to what else I could do with chocolate and avocado. Of course I had to put my obsession with frozen drinks to good use, and the result was the most incredibly creamy chocolate pudding meets milkshake. You should also know that I'm not the biggest chocolate fan, but to me, this was so much better than anything I'd find at an ice cream shoppe. I used half a cup of almond milk here, and spooned it up in a little bowl topped with coconut flakes and granola. Next time I'm going to try a full cup of milk to get my shake on through a straw. Summer is almost at a close, and one thing I'll really miss is my constant craving for frozen treats. Don't get me wrong, the Fall is my season, but as the weather gets a little chillier, slurping down smoothies gets a little harder, especially first thing in the morning. 


Banana + Avocado + Cacao Smoothie Bowl
use a little more milk if you're looking to drink through a straw

1/2 cup vanilla almond milk
1 frozen banana
1/2 avocado
2 tablespoons raw cacao powder
1 medjool date
1 teaspoon maca powder
handful of kale or spinach

Process all of your ingredients in a high-powered blender until thick and creamy. Add more or less almond milk depending on the consistency you're going for. Mine was like soft serve ice cream, so I served it in a bowl and topped it with coconut flakes and Purely Elizabeth granola. 

8.16.2013

Raw Almond Butter + Coconut Cups


Finding healthy alternatives in a world that also creates Reese's Pieces is not an easy task. I get it, it's hard to eat right all of the time. But when you also have medjool dates at your disposal, I promise it will get easier (is that only something a lunatic would say?). I promise I didn't storm into this world with a bottle full of kale juice and a diaper made of pinecones. I ate junk just like everyone else, probably more so. My diet now is the result of years of food network viewing, food blog browsing, and an ever evolving passion for whole foods (both the store and the term for food in its original state). Pinterest has also brought some new game to my inner foodie. With the amount of pins I have, you'd think I lived inside a Martha Stewart Living magazine, but I swear I'm just like everyone else, and have really only mastered the sock bun (which I'm so over by the way. Top knots = life). This recipe in particular was inspired by my vegan sweet board, which I really need to explore more of. I tend to steer away from dessert making, even the healthy kind, because I have no self control and will eat 45 raw brownie bites as quickly as I roll them out. Pig. But when I have a group of fellow eaters to share with however, I'll gladly oblige. 

I made these cups for a music festival I went to last weekend with some great gal pals. We threw together some flower crowns (the best), stuffed a cooler, and headed to Devens, MA (Uh, is this place real? No, I don't mean Danvers). Traveling with girls is pretty great. The spread of food we brought to share almost convinced me to bail on the music and binge eat in the hotel room all night. Almost. We did our fare share of eating and drinking before me made our way to The Nines Festival, and then continued to do so once we arrived. The weather was perfect, the music was flowing, and things definitely got crazy. Vodka milkshakes happened, too. I'm pretty positive it was a curdled mess, but I really can't be sure. I might have also took a power nap in the beer tent, if we're being honest. 


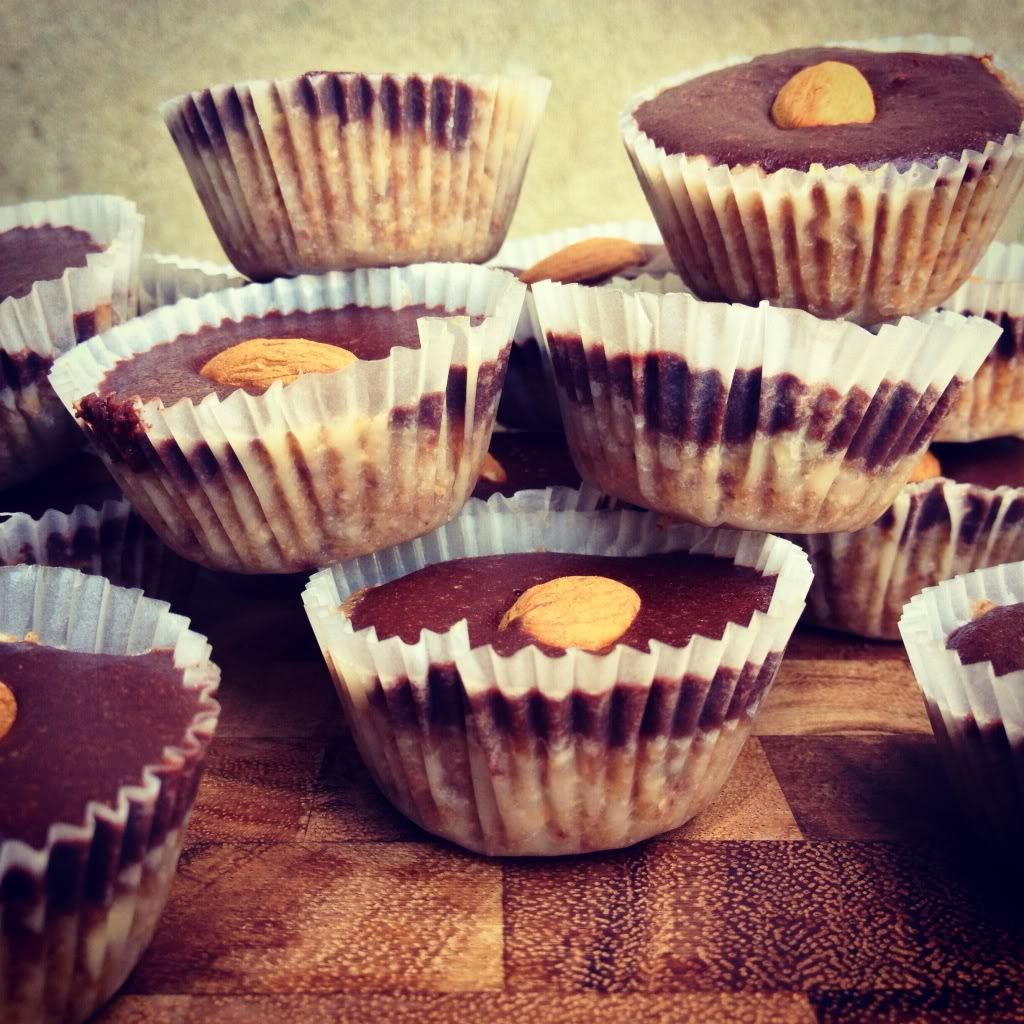
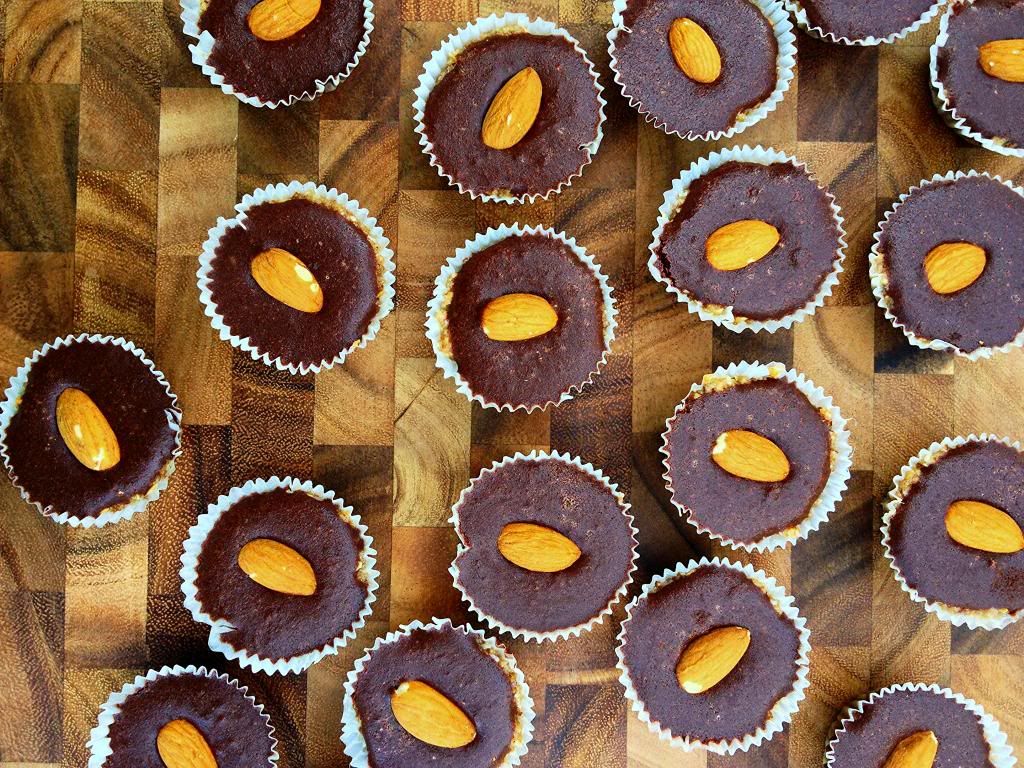
These almond butter and coconut cups were the hit of the weekend. The original recipe called for peanut butter, and I'll be going that route next time to see if it compares to the classic Reese's cup, but I went with almond butter this time, because I love the coconut-almond combination. I also added some dates because my sweet tooth has no limit. I made a batch of raw chocolate for the topping, instead of melting chocolate chips, because I have a need to impress people with anything I do. But I also realized that making raw chocolate is super easy, and the results are incredible. Really. I'll never buy chips again. This recipe makes a good amount, and I made sure to leave a few at home for when the craving struck again (I ate them all as soon as I walked through my front door). I stuck them in my freezer, and ate them straight from there. No need to thaw, they do so pretty quickly anyways. 


RawAlmond Butter + Coconut Cups
Inspired by This Rawsome Vegan Life
Makes about 25-30 mini cups

1 cup shredded coconut
3/4 cup oats
1/4 cup maple syrup
6 medjool dates
1/4 teaspoon cinnamon
1/2 tablespoon vanilla extract
1/2 cup almond butter
2 tablespoons coconut oil, melted
sea salt, for sprinkling
raw almonds, for decorating tops

Raw Chocolate

1/2 cup maple syrup
3/4 cup raw cacao powder
1/3 cup coconut oil, melted
1/2 tablespoon vanilla extract

Add the first eight ingredients (shredded coconut through coconut oil) to your food processor, and blend until you've got a rough paste - a couple minutes or so. Divide the mixture among lined mini cupcake trays, leaving room to top with melted chocolate. Press the mixture firmly inside the cupcake papers. 

Whisk together all of the ingredients for the raw chocolate. I did this inside a liquid measuring cup so I could easily pour the chocolate on top of the coconut-almond-oatmeal mixture. Top each cup with a raw almond and a sprinkling of sea salt. Refrigerate for a couple hours, or overnight, and enjoy. They also freeze extremely well. 

7.16.2013

Mint Chip Smoothie


Another 90° day, another smoothie. Does anyone else feel entitled to frozen treats in the warmer months? I mean especially here in New England. We shiver through almost half of the year, and when June rolls around, we deserve some ice cream. In my case it's endless variations of fruit and vegetable combinations in my Nutri-Bullet. I've already shared my go-to morning super smoothie, but here it's less about packing in the vegetables, and more about superfood-ing (definitely not a word) a popular ice cream flavor. I've always been a vanilla girl. Since childhood, I've rarely strayed from my vanilla-in-a-cup-with-rainbow-sprinkles ice cream order. That being said, I don't think I've ever tried actual mint chocolate chip ice cream. Maybe a taste or two before realizing it's no where near as good as straight vanilla (in my opinion). You should also know that as a kid, I did not have the healthiest or most adventurous of taste buds. You would be quite astounded when comparing the way I eat now to the way I ate then. Sweets ruled my world. Vegetables did not. I had an aversion to salad. Not that they didn't look delicious, I really just didn't like crunchy vegetables. I used to dream of being a salad eater (true story). Salad eaters seemed to be apart of this exclusive foodie club that I wanted membership to. And somewhere along my journey to adulthood (and addiction to the Food Network), I learned a thing or two about food, and really fell in love with cooking. My diet has been cleaning itself up since college, and I think I'm at a really good place now. When I eat food, I think of what it can do for me. I rarely, if ever, put something in my body that isn't going to benefit me in some way. I'm far from perfect, but when it comes to nutrition, I try my very hardest to stay on track. You only get one body, and I want mine to be its best version long into my old age - looking great in a bikini when I'm 50 won't hurt either. 

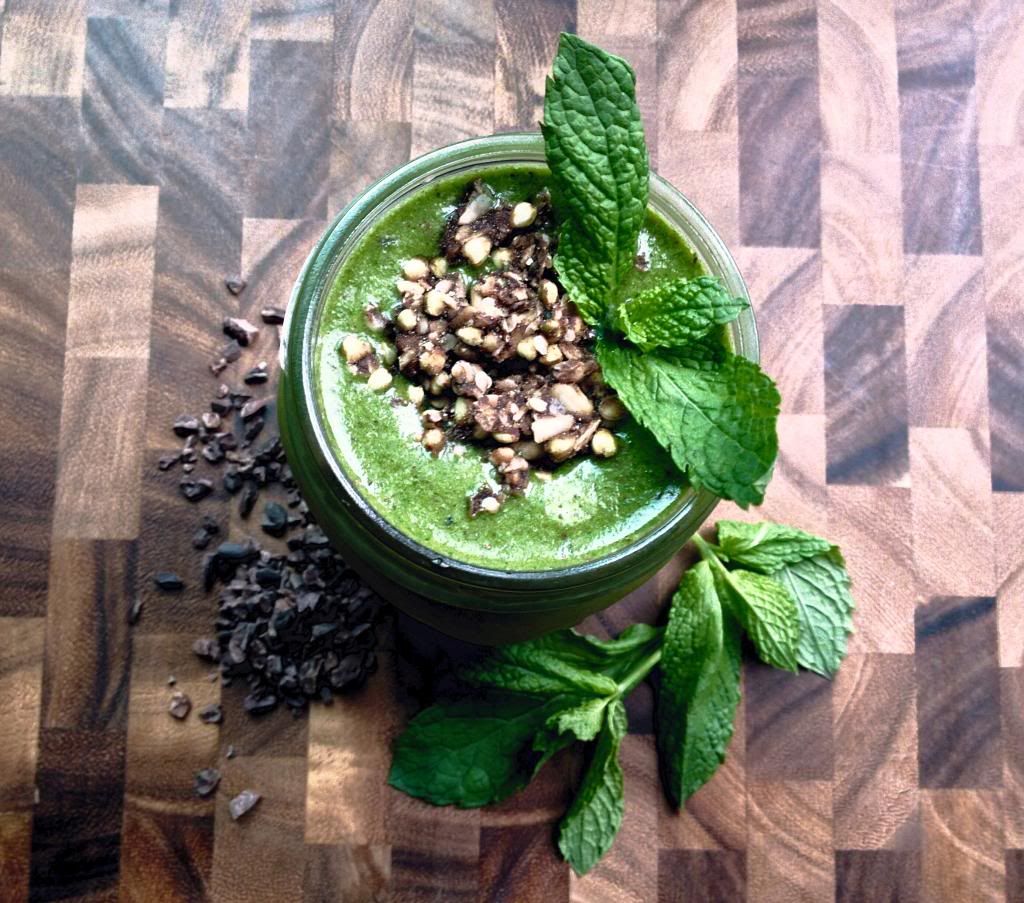
Back to the situation at hand: I can't really be a judge to the comparison of this smoothie to mint chocolate chip ice cream. But I think with a little common sense, I can take a guess as to what I'm working with here (mint flavored ice cream + chocolate chips?). I think my combination is pretty spot on. Has anyone else tried adding frozen watermelon to their smoothies? You'd be quite pleased with the outcome. It imparts a very subtle sweetness, but what it does to the texture is magical, turning any smoothie combination into more of an ice cream. I usually enjoy my smoothies through a straw, but if you're looking for something thicker and spoonable, I'd say decrease your almond milk amount, and maybe use a whole frozen banana. Play around with it, and see what works for you. I almost always add protein powder to my smoothies, but it definitely alters the taste and texture. Leave it out if you're going the ice cream route. I also topped mine with this raw, chocolate granola, mostly because it's addicting, and also because I was heading to the gym after and some extra calories couldn't hurt - not that I'm in any way an animal at the gym. I just love excuses to eat more.

Mint Chip Smoothie
Inspired by The Chalkboard Mag

3/4-1 cup almond milk
1 teaspoon vanilla extract
1/2 banana, frozen
1 cup watermelon chunks, frozen
1/2 cup fresh mint leaves
2 tablespoons cacao nibs, divided
1/2 tablespoon coconut oil
2 cups spinach, packed (I squeeze in as much as possible)
1 scoop protein powder (optional)
2 tablespoons chocolate granola (optional, I use this one)

Add all the ingredients, except for 1 tablespoon of the cacao nibs and the granola, to your blender and give it a whirl. I usually blend everything but the spinach, then pack in as much spinach as possible for round two of blending - I find I can fit more in this way (the Nutri-Bullet isn't all that big). Stir in the remaining tablespoon of cacao nibs, top with some granola, and enjoy your frozen treat, guilt-free. 

7.19.2009

S'mores Cupcakes

S'mores Cupcakes

Did You Know? The first recipe for s'mores was published in 1927 in the Girl Scout Handbook, and the event marked the official introduction of the s'more into popular culture.

It's been a pretty crazy past few weeks for the bakery, so I haven't been able to post as much as I'd like to. With cookouts and birthday parties, I've been quite the busy baker, which is exactly what I had hoped for. Last Wednesday, was a huge night for Sweet Inspirations. We had a promo at Felt Boston, and baked all the desserts for their girls night. Chocolate was the theme of the night, so chocolate is exactly what we made, with a few extras thrown in for good measure. We put togther quite the spread, and Felt was nothing short of impressed. The night was spent getting our name out there, and I think people were pretty responsive. They loved the idea of such young people starting their own business, and good food to go along with that never hurts. Talks of a partnership with Felt are also in the works, but I'll let you know about that when things are more clear. We have a bunch of orders in the next few weeks, so I hope I'm not too busy to keep you updated. I'll definitely be posting what we made for Felt in the next few days, but until I get all my pictures uploaded, I'd thought I'd share some S'mores cupcakes...


S'mores Cupcakes

S'mores Cupcakes

I've made these twice in the past two weeks, so I guess that says something for how good they are. First for a Fourth of July cookout, and next for my best friend, and partner in crime, Chris' graduation party. They start off with a graham cracker crust, followed by a thin layer of melted chocolate. A chocolate cake makes up the filling, which is sprinkled with even more graham cracker crumbs and melted chocolate. Topped off with a toasted marshmallow frosting, and a hershey bar, these cupcakes are quite the show stoppers.


S'mores Cupcakes

S'mores Cupcakes

S'mores Cupcakes
Adapted from Martha Stewart

2 1/4 cups plus 2 tablespoons sugar
1 3/4 cups all-purpose flour
3/4 cup plus 1 tablespoon cocoa powder (not Dutch-processed)
1 1/2 teaspoons baking powder
1 1/2 teaspoons baking soda
1 teaspoon salt
2 large eggs
1 cup whole milk
1/2 cup vegetable oil
2 teaspoons pure vanilla extract
1 cup boiling water
2 cups graham cracker crumbs
1/2 cup unsalted butter, melted
9 ounces bittersweet chocolate, finely chopped
Marshmallow Frosting, recipe follows
Hershey bars, for garnish


Preheat oven to 350 degrees. Line 2 standard muffin tins with cupcake liners; set aside.

Sift 2 cups plus 2 tablespoons sugar, flour, cocoa powder, baking powder, baking soda, and salt together into the bowl of an electric mixer. Using the paddle attachment, mix ingredients together on low speed.

In a large bowl, mix together eggs, milk, oil, and vanilla. Add to flour mixture and beat on medium speed for 30 seconds. Scrape down sides of bowl and continue mixing on medium speed for 2 minutes. Add boiling water and stir to combine; set cake batter aside.

Place graham cracker crumbs, remaining 1/4 cup sugar, and melted butter in a large bowl; stir until well combined.

Place 1 tablespoon graham cracker mixture into the bottom of each prepared muffin cup. Use the bottom of a small glass to pack crumbs into the bottom of each cupcake liner. Reserve remaining graham cracker mixture for topping.

Place 2 teaspoons chocolate in each muffin cup. Transfer muffin tins to oven and bake until the edges of the graham cracker mixture is golden, about 6 minutes. Remove from oven and fill each muffin cup three-quarters full with cake batter. Sprinkle each with remaining chocolate and graham cracker mixture. Return to oven and bake, rotating pans halfway through baking, until tops are firm and a cake tester inserted in the center comes out clean, 18 to 20 minutes. Transfer muffin tins to a wire rack and let cupcakes cool in pan for 10 minutes. Remove cupcakes from pan and let cool completely.

Once cool, place cupcakes back inside the muffin tins, and frost them using a large plain round or French tip (such as Ateco #867 or Ateco #809), fitted inside of a pastry bag. With the oven broiler on high, place the trays (one at a time) inside the oven, as close to the top as possible. Close the oven for 30 seconds, then open, and watch the frosting as it turns golden brown. You may have to rotate the pan for even coloring. This process happens very quickly, so keep a close eye. While still warm, tuck a Hershey bar inside each and enjoy!

Yields 2 dozen cupcakes.


Marshmallow Frosting
Adapted from Martha Stewart

8 large egg whites
2 cups sugar
1/2 teaspoon cream of tartar
2 teaspoons pure vanilla extract


Place egg whites, sugar, and cream of tartar in the heatproof bowl of an electric mixer. Set over a saucepan with simmering water. Whisk constantly until sugar is dissolved and whites are warm to the touch, 3 to 4 minutes.

Transfer bowl to electric mixer fitted with the whisk attachment, and beat, starting on low speed, gradually increasing to high, until stiff, glossy peaks form, 5 to 7 minutes. Add vanilla, and mix until combined. Use immediately.

Makes more than enough for 2 dozen cupcakes.


S'mores Cupcakes

6.30.2009

Sweet Inspirations: Linzer Cookies

Raspberry & Nutella Linzer Cookies

Did You Know? Outselling every brand of peanut butter combined, the amount of Nutella produced worldwide in one day is equivalent to nearly three times the weight of the Statue of Liberty.

The bakery has really been a lot of fun for me and Chris, and we can't help but to spend our days dreaming of the future of the business. Sweet Inspirations had its largest order to date over the weekend (8 dozen cookies), and it couldn't have gone smoother. Salvage Chic, an antique store located in Bryantville Center (Pembroke), contacted me a few weeks ago, in hopes of ordering something special for a sale they would be having this past weekend. I knew their logo involved price tags, so we set out to make some pretty impressive cookies for the event. Linzer cookies were our choice, giving us the ideal recipe to get creative with. We could cut out price tags for the base, and include the initials of the store for the jam to show through. Although the dough was by far the toughest I'd worked with, they turned out wonderfully, and tasted even better.


Raspberry & Nutella Linzer Cookies

Raspberry & Nutella Linzer Cookies

The dough was made with ground up hazelnuts, and for some reason, all it wanted to do was tear, and fall apart. I knew from the comments left by others that it wasn't the most cooperative recipe, but I thought I might have better luck. In the end, it all worked out, and I found that freezing the dough for a little before cutting out the initials worked the best. Just make sure to roll the dough between parchment paper, or you'll never get it off the rolling pin. And don't let my troubles scare you from trying this recipe, it was a huge success among everyone who tried them, and they only get better as the days go on - a great cookie if you're looking for something to make ahead of time.


Raspberry & Nutella Linzer Cookies

Raspberry & Nutella Linzer Cookies

If you live in the South Shore, and have not yet stopped by Salvage Chic, I highly recommend you do so. Christine and Claudia, the two owners, could not be any nicer, and the store itself is something out of a magazine. Each room is set up like a different room in a house, filled with items both old and new. I recently picked up a beautiful glass juicer and a set of vintage cookie jars with my sister and Maddie, and plan on going back to scan through their fabulous aprons. It's always our first stop when we're antique hunting, and we never leave empty handed. They even have a blog, so if you don't live nearby, you can check out all their finds over there.


Raspberry & Nutella Linzer Cookies

Raspberry & Nutella Linzer Cookies
Adapted from Gourmet via Epicurious

2/3 cup hazelnuts (3 oz)
1/2 cup packed light brown sugar
2 1/2 cups all-purpose flour
1/2 teaspoon baking powder
1/2 teaspoon salt
1/4 teaspoon cinnamon
2 sticks (1 cup) unsalted butter, softened
1 large egg
1 teaspoon vanilla
1 12-oz jar seedless raspberry jam (or Nutella)
Confectioners' sugar (for dusting)

Special equipment: a 2- to 2 1/4-inch fluted round cookie cutter and assorted 1/2-inch shaped cookie cutters or aspic cutters


Put oven rack in middle position and preheat oven to 350°F.

Toast hazelnuts in a shallow baking pan until fragrant and skins begin to loosen, about 6 minutes. Rub nuts in a kitchen towel to remove any loose skins (some skins may not come off), then cool to room temperature.

Pulse nuts and 1/4 cup brown sugar in a food processor until nuts are finely ground.

Whisk together flour, baking powder, salt, and cinnamon in a small bowl.

Beat together butter and remaining 1/4 cup brown sugar in a large bowl with an electric mixer at medium-high speed until pale and fluffy, about 3 minutes in a stand mixer (preferably fitted with paddle) or 6 minutes with a handheld. Add nut mixture and beat until combined well, about 1 minute. Beat in egg and vanilla. Reduce speed to low and add flour mixture, mixing until just combined.

With floured hands, form dough into 2 balls and flatten each into a 5-inch disk. Chill disks, wrapped in plastic wrap, until firm, at least 2 hours.

Put oven racks in upper and lower thirds of oven and preheat oven to 350°F.

Roll out 1 disk of dough into an 11-inch round (1/8 inch thick) between 2 sheets of wax paper (keep remaining dough chilled). If dough becomes too soft to roll out, rewrap in plastic and chill until firm. Cut out as many cookies as possible from dough with larger cookie cutter and transfer to 2 ungreased large baking sheets, arranging about 1 inch apart. Using smaller cutters, cut out centers from half of the cookies, reserving centers and rerolling along with scraps (reroll only once). Bake cookies, switching position of sheets halfway through baking, until edges are golden, 10 to 15 minutes total, then transfer with a metal spatula to racks to cool completely. Make more cookies from second disk.

Dust the windowed cookies with confectioners' sugar. Spread about 1 teaspoon jam (or Nutella) on flat side of 1 solid cookie and sandwich jam with flat side of 1 windowed cookie. Sandwich remaining cookies in same manner.

Cookies keep, layered between sheets of wax paper or parchment, and chilled in an airtight container, 2 weeks.


Salvage Chic Antiques

6.23.2009

Vanilla Layer Cake with Bittersweet Buttercream

Vanilla Layer Cake with Bittersweet Buttercream

Did You Know? The history of birthday cakes come from the Greeks, who would take their round, moon-shaped cakes to the temple of Artemis-the Goddess of Moon. The tradition of placing lit candles on these cakes signified the glowing moon, and many believed the smoke of the candles carried their wishes and prayers to the Gods who lived in the skies above.

It was my Mom's birthday last month, so I went with the usual 'I'll-cook-for-you-since-I-have-no-money-to-buy-you-anything' present. A yellow cake with chocolate frosting is what she requested, so that's exactly what I made, jazzed up with a little heath bar of course. I love baking for birthdays, and cooking up dishes that are unique to the tastes of who they're intended for. For my mom, I went with the classic 1,2,3,4 cake. I mean it's all over the web for a reason - it's good, really good. The whipped buttercream frosting on Smitten sounded amazing, so I topped it off with that, and sprinkled some toffee bits all over the top.

The day I made this was unbelievably hot and humid, so I had a hard time keeping the frosting from melting. It wasn't a problem for too long, as we ate our fair share of cake pretty quickly, and shared the rest with our neighbors. If you're tempted to refrigerate this cake, I strongly urge you not to. I put a few pieces in the fridge overnight, and they dried out terribly. I later read that butter cakes should never be chilled for that specific reason. Other than that, this cake will definitely be one of my go-to recipes. Next up will be a cupcake version for sure.


Vanilla Layer Cake with Bittersweet Buttercream

In other news, my bakery has been pretty successful these past few weeks, and me and Chris couldn't be more excited. We have an event at Felt Night Club in Boston on July 8th, so we're really looking forward to that - a lot of great advertising. They host girl's nights every Wednesday, and the 8th is chocolate-themed. I've already got our menu planned out, but if you live in the area, I'd love to meet some of you, so contact Felt for all the details. I've also set up a Facebook page for Sweet Inspirations, so check that out, and make sure you become a fan! We can use all the support we can get. I've put a Facebook widget on the bottom of this page, so click over from here or there. Thanks!


Vanilla Layer Cake with Bittersweet Buttercream
Adapted from Smitten Kitchen

1 cup (2 sticks) butter, softened
2 cups sugar
4 eggs
3 cups sifted self-rising flour
1 cup milk
1 teaspoon pure vanilla extract
Bittersweet Buttercream, recipe follows


Preheat oven to 350°F. Grease and flour three 9-inch round cake pans*, set aside.

Using an electric mixer, cream butter until fluffy. Add sugar and continue to cream well for 6 to 8 minutes. Add eggs 1 at a time, beating well after each addition. Add flour and milk alternately to creamed mixture, beginning and ending with flour. Add vanilla and continue to beat until just mixed.

Divide batter equally among prepared pans. Level batter in each pan by holding pan 3 or 4-inches above counter, then dropping flat onto counter. Do this several times to release air bubbles and assure you of a more level cake. Bake for 25 to 30 minutes or until a tester or toothpick inserted into the center comes out clean.

*You'll notice only two layers in my cake. I used two 9-inch pans, along with 5 or so cupcakes.


Bittersweet Buttercream
Adapted from Smitten Kitchen

10 ounces bittersweet chocolate
1 1/2 cups heavy cream
1 1/2 sticks unsalted butter, softened
2 cups confectioners' sugar


Melt the chocolate with the cream in a double boiler or metal bowl set over a pan of simmering water. Whisk to blend well. Remove from heat and let stand, whisking occasionally, until the chocolate mixture thickens to the consistency of mayonnaise.

Place the butter in the bowl of an electric mixer, and on medium speed, whip the butter until light and fluffy. Add the chocolate cream and whip until lighter in color and somewhat stiff, about three minutes. Add in the confectioners sugar, whip again, and continue to add until you have reached your desired consistency.


Vanilla Layer Cake with Bittersweet Buttercream

3.24.2009

Sydney's Double Chocolate Layer Cake

Double Chocolate Layer Cake

Did You Know? At the time Marie Antoinette uttered the infamous quotation "let them eat cake," the word "cake" did not refer to the familiar dessert item that the modern-day French call le gateau. The operative term was brioche, a flour-and-water paste that was "caked" onto the interiors of the ovens and baking pans of the professional boulangers of the era. At the end of the day, the baker would scrape the leavings from his pans and ovens and set them outside the door for the benefit of beggars and scavengers. Thus, the lady in question was simply giving practical, if somewhat flippant, advice to her poor subjects: If one cannot afford the bourgeois bread, he can avail himself of the poor man's "cake."

After a ridiculous conversation about boxed cake versus homemade, I decided to put the argument to rest, and convince my skeptical sister that homemade is the only way to go. We often joke about how off her taste buds are, prefering all the cheap, artficial foods over a nice, healhy meal. She says if she knows one thing, it's chocolate cake (something about an entire Entenmann's?). And she was positive the boxed cake was superior to anything I could bake from scratch (she's kind like that). From that statement on, I was on a mad hunt for the ultimate chocolate cake recipe.

High on the list when Googling "chocolate cake," this particular recipe had it's devoted followers. Originally featured in Gourmet, this cake must have been replicated at least a thousand times since. Declared as Deb's favorite, the layered masterpiece I was about to recreate had my approval. And since I had a skeptic on my hands, I had to buy only the finest quality ingredients. So off to Whole Foods I went. Two pounds of Callebaut later, and thirty dollars lighter (well I guess I wasn't thirty dollars lighter - thanks Mom), I was in my kitchen, and ready to conquer the chocolate cake.


Double Chocolate Layer Cake

I was surprised at the amount of hot coffee the recipe called for. I definitely didn't want a mocha-flavored cake, so that made me nervous. I couldn't have been more wrong. The coffee brought out a depth of flavor from the chocolate that I had never tasted before. And that chocolate. I will never go back to Ghirardelli again. The original called for semisweet. But I could only find bitter and milk, so I bought both and combined the two. The end result was truly amazing. Moist, tender crumbs, sandwiched by a rich chocolate ganache. The flavors were beyond complex. And the debate we had on our hands? Long forgotten.

Double Chocolate Layer Cake


Double Chocolate Layer Cake
Adapted from Epicurious via Gourmet, March 1999

Cake Layers
3 ounces fine-quality semisweet chocolate (I used milk chocolate Callebaut)
1 1/2 cups hot brewed coffee
3 cups sugar
2 1/2 cups all-purpose flour
1 1/2 cups unsweetened cocoa powder (not Dutch process)
2 teaspoons baking soda
3/4 teaspoon baking powder
1 1/4 teaspoons salt
3 large eggs
3/4 cup vegetable oil
1 1/2 cups well-shaken buttermilk
3/4 teaspoon vanilla

Ganache Frosting
1 pound fine-quality semisweet chocolate (I used a combo of milk and bittersweet Callebaut)
1 cup heavy cream
2 tablespoons sugar
2 tablespoons light corn syrup
1/2 stick (1/4 cup) unsalted butter


Make Cake Layers
Preheat oven to 300°F, and grease two 10-inch round cake pans. Line bottoms with rounds of wax paper and grease paper.

Finely chop chocolate and in a bowl combine with hot coffee. Let mixture stand, stirring occasionally, until chocolate is melted and mixture is smooth.

Into a large bowl sift together sugar, flour, cocoa powder, baking soda, baking powder, and salt. In another large bowl with an electric mixer beat eggs until thickened slightly and lemon colored (about 3 minutes with a standing mixer or 5 minutes with a hand-held mixer). Slowly add oil, buttermilk, vanilla, and melted chocolate mixture to eggs, beating until combined well. Add sugar mixture and beat on medium speed until just combined well. Divide batter between pans and bake in middle of oven until a tester inserted in center comes out clean, 1 hour to 1 hour and 10 minutes.

Cool layers completely in pans on racks. Run a thin knife around edges of pans and invert layers onto racks. Carefully remove wax paper and cool layers completely. Cake layers may be made 1 day ahead and kept, wrapped well in plastic wrap, at room temperature.

Make Frosting
Finely chop chocolate. In a 1 1/2- to 2-quart saucepan bring cream, sugar, and corn syrup to a boil over moderately low heat, whisking until sugar is dissolved. Remove pan from heat and add chocolate, whisking until chocolate is melted. Cut butter into pieces and add to frosting, whisking until smooth.

Transfer frosting to a bowl and cool, stirring occasionally, until spreadable (depending on chocolate used, it may be necessary to chill frosting to spreadable consistency).

Spread frosting between cake layers and over top and sides. Cake keeps, covered and chilled, 3 days. Bring cake to room temperature before serving.

Double Chocolate Layer Cake

1.03.2009

Supernatural Brownies

Supernatural Brownies

Did You Know? The brownie, also known as the Boston Brownie, traces all the way back to the 1800s. And although sources aren't clear on the exact date the first brownie recipe was published, they do know the recipe stemmed from a Boston-based cookbook.

The name says it all. My sister needed to bring a dessert to a dinner party she was attending, and of course she turned to me to create something for her. If it hadn't been for the fact that I had just received a KitchenAid Artisan Stand Mixer for Christmas, I might have told her to bake something herself. But I just had to use that new mixer again. It has made cooking and baking so much more fun, and it is just so pretty. Now I hope I can crack my parents into buying a Vita-Mix, they seem to be all the rage in the blogging world, and I desperately want to whip out some homemade nut butters. Until then...

Now, back to the brownies. My sister has always been a fan of the cakey brownie, while I, along with the rest of my family, enjoy a fudgy one. Since it was for her and all, I decided to make a cakey version. So Monday night, I cranked out a batch of Moosewood Fudge Brownies, that I saw on 101 Cookbooks. Yeah, yeah, fudge brownies. But all the comments revealed how cakey these were, and with 5 eggs, I knew fudgy was one thing these probably were not.


Supernatural Brownies

It turns out my intuition was right. These were the cakiest (?) brownies I have ever tasted. In fact, they sort of just tasted like little squares of rich chocolate cake. They didn't taste like brownies at all, but strangely, we all really enjoyed them (especially my sister). I wouldn't recommend baking these if you're really in the mood for a brownie, but if you're looking for a different spin on a classic, and you love the cakey texture, try these out. Fresh from the oven, they have a really nice bite, and the chocolate flavor slowly develops - it's really quite strange.

White & Brown Sugar

So because the brownies didn't turn out as I had hoped, I had to make another batch. The perfectionist in me wouldn't let me settle on the Moosewood version if people other than my family were expecting to eat a brownie. Here's where I turned to David Lebovitz for some inspiration. His post for Supernatural Brownies, is from the book "Chocolate: From Simple Cookies to Extravagant Showstoppers," by Nick Malgieri, and it happens to be the best brownie I have ever eaten. It's fudgy, but still light enough for those cake lovers to enjoy as well. It's rich and flavorful, and the chocolate, oh that chocolate. How could you go wrong adding a bowlful of melted chocolate and butter. Trust me, you must bake these. Warm and wrapped with slowly melting vanilla ice cream, these brownies are dessert at its finest. So much for that "eat healthy" New Year's resolution. One brownie won't hurt, but good for you if you only need one.

Supernatural Brownie Making

Supernatural Brownies
2 sticks unsalted butter, each cut into thirds
8 ounces bittersweet or semisweet chocolate (I used 4 ounces of each), broken into pieces
4 large eggs
1/2 teaspoon salt
1 cup granulated sugar
1 cup firmly packed dark brown sugar
2 teaspoons vanilla extract
1 cup all-purpose flour
One 13x9x2-inch pan, buttered

Set the rack in the middle of the oven and preheat to 350 degrees.

Combine the butter and chocolate in a heat proof bowl and microwave in intervals of 30 seconds or so, until melted (stir in between heatings).

Whisk eggs together in a large bowl, then whisk in the salt, sugars, and vanilla. Stir in the chocolate and butter mixture, then fold in the flour.

Pour batter into prepared pan and spread evenly. Bake for about 45 minutes, until top has formed a shiny crust. Cool in pan, or enjoy hot from the oven.

Cakey vs Fudgy

Now I'm guessing I don't have to tell you which is which, but just in case...the left is Moosewood (cakey) and the right is Supernatural (fudgy).

12.19.2008

German Chocolate Cake

German Chocolate Cake

Did You Know? German Chocolate Cake was not brought to America by German immigrants. The cake took its name from an American with the last name of "German."

I mentioned in a recent post that I had spent a delicious Friday night baking with my mom, so I thought I would share what expactly we baked up. Trust me, this post is not for the faint of heart...

One of my favorite people to cook for is my Dad, and when he called home from work the other day to request some sort of dessert from my mom, I took over the bakers role. I'd been wanting to test out this recipe for some time (knowing it was one of my Dad's favorites) so I thought this was as good a time as any. The recipe at hand...German Chocolate Cake. A decadently rich, layer cake that is not to be taken lightly. This particular recipe incorporated moist cake layers sandwiched between a caramel-like pecan and coconut spread, all of which was drowned in an intense chocolate ganache frosting

German Chocolate Cake Baking

What set this cake apart from other chocolate cakes I had baked in the past, was the addition of melted chocolate to the cake batter, instead of the usual cocoa powder. This definately intensified the flavor, but the addition of whipped egg whites took away any doubts I had that this cake would be to dense. After giving the bowl a good lick, I watched as my cakes rose to perfection in the heat of the oven. The daunting task awaiting in the future: cutting each cake into two layers. It didn't turn out all that bad, but they were by no means cut straight across. The coconut-pecan filling did a beautiful job at masking my imperfections. Not being a huge chocolate cake fan myself, I ended up putting a nice dent into this one. Trust me, it's really good, but really filling. I found myself hunched over on the couch after eating just a small slice.

A quick note about the frosting...mine did not set up like I thought it would, so I ended up just pouring the entire bowl over the top and letting it drip down the sides. The directions say to pipe it on, but the consistency I ended up with was in no shape for piping - much too liquidy. In the end, I loved how it turned out. It may seem like a lot of ganache to be pouring on a cake, but you won't be sorry when all is said and done.

I would have posted the recipe here, but I think David's step by step instructions are perfect as is...so check it out here and see for yourself! I'll leave you with an in-your-face slice of heaven...

German Chocolate Cake

Happy Baking...Hayley

Back to Top