3.28.2009

Chickpea, Tomato, & Barley Soup

Chickpea, Tomato, & Barley Soup

Did You Know? Grains found in pits and pyramids in Egypt indicate that barley was cultivated there more than 5000 years ago. The most ancient glyph or pictograph found for barley is dated about 3000 B.C. In fact, Historians report that up until the 16th century, barley was the most important grain on the European continent. It was also used as currency and as a measuring standard.

Trying to keep my promise of cooking more from the magazines I subscribe to, this next recipe is from a past issue of Body and Soul, a division of Martha Stewart. If you're not familiar with the magazine, I definitely recommend checking it out. It's full of useful health and wellness information, workouts, recipes, and sustainable living advice, but with that Martha Stewart flair we all love. The pictures are beautiful, and the companies and products featured somehow seem to make their way onto my grocery list each and every week.

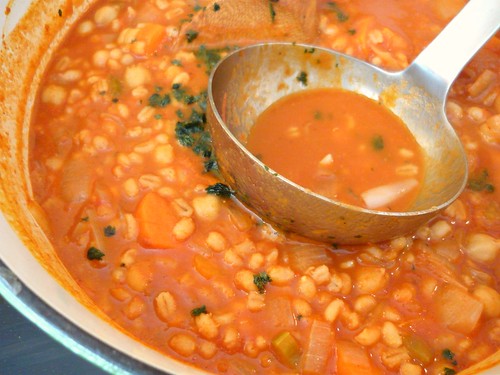
This particular soup recipe has become a family staple ever since I first made it many months ago. I don't know why I never shared it here, but I'm guessing it's because I never got around to photographing it before the pot was empty. I'm always looking for thick and hearty soups to prepare. Something that will fill me up on its own, and not as a side to some other dish. With 19 grams of protein, and 12 grams of fiber, this soup is nutritious and satisfying.


Chickpea, Tomato, & Barley Soup

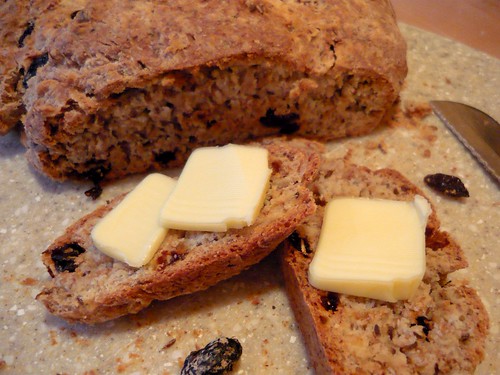
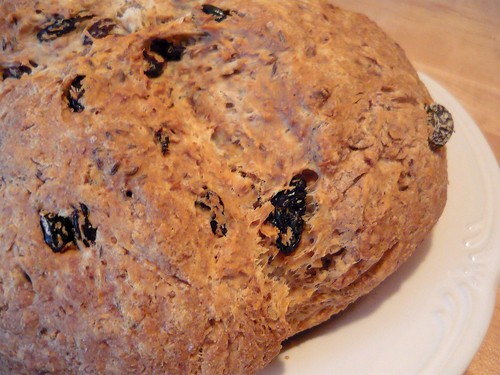
The original recipe calls for spelt, but I substituted that with barley since its what I had on hand. We all like the flavor so much, I have yet to make the spelt version. That, and I've never seen spelt offered at any of my local grocery stores. I also top it off with cilantro instead of parsley. Mainly because of my recent obsession with this wonderful herb. Other than that, I followed the recipe pretty much to the T. Starting any soup with a mirepoix is almost a guarantee that you'll end up with a flavorful bowl. And the creamy chickpeas work wonderfully with the nutty barley and the spicy tomato broth. It also makes for great leftovers. Just make sure you have some extra broth on hand, because it thickens up substantially in the fridge. Served with a nice salad and fresh loaf of bread, lunch could not have been better.

Chickpea, Tomato, & Barley Soup

Chickpea, Tomato, & Barley Soup
Adapted from Body and Soul Magazine

1 cup barley
2 tablespoons olive oil
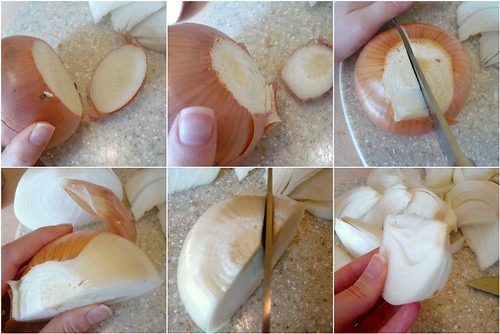
1 medium onion, chopped
2 carrots, halved lengthwise and cut into 1/2-inch lengths
2 celery stalks, diced
4 garlic cloves, chopped
Coarse salt and ground pepper
2 bay leaves
2 teaspoons sweet paprika
1 teaspoon ground cumin
4 cups vegetable broth
1 can (14 1/2 ounces) crushed tomatoes
1 can (15 ounces) chickpeas, drained and rinsed
1/4 cup chopped cilantro, for garnish

Rinse barley clean under running water. Place in a medium bowl and cover with cold water. Let soak for 1 hour; drain.

In a 5-quart Dutch oven or large soup pot, heat oil over medium. Add onion, carrot, celery, and garlic. Season with salt and pepper and cook for 5 minutes. Add bay leaves, paprika, cumin, barley, broth, and 1 cup of water. Bring to a boil, reduce to a simmer, and cook for 30 minutes or until barley is tender.

Add tomatoes and chickpeas and cook for 20 minutes or until flavors have blended. Discard bay leaves. Sprinkle with chopped cilantro before serving.


3.24.2009

Sydney's Double Chocolate Layer Cake

Double Chocolate Layer Cake

Did You Know? At the time Marie Antoinette uttered the infamous quotation "let them eat cake," the word "cake" did not refer to the familiar dessert item that the modern-day French call le gateau. The operative term was brioche, a flour-and-water paste that was "caked" onto the interiors of the ovens and baking pans of the professional boulangers of the era. At the end of the day, the baker would scrape the leavings from his pans and ovens and set them outside the door for the benefit of beggars and scavengers. Thus, the lady in question was simply giving practical, if somewhat flippant, advice to her poor subjects: If one cannot afford the bourgeois bread, he can avail himself of the poor man's "cake."

After a ridiculous conversation about boxed cake versus homemade, I decided to put the argument to rest, and convince my skeptical sister that homemade is the only way to go. We often joke about how off her taste buds are, prefering all the cheap, artficial foods over a nice, healhy meal. She says if she knows one thing, it's chocolate cake (something about an entire Entenmann's?). And she was positive the boxed cake was superior to anything I could bake from scratch (she's kind like that). From that statement on, I was on a mad hunt for the ultimate chocolate cake recipe.

High on the list when Googling "chocolate cake," this particular recipe had it's devoted followers. Originally featured in Gourmet, this cake must have been replicated at least a thousand times since. Declared as Deb's favorite, the layered masterpiece I was about to recreate had my approval. And since I had a skeptic on my hands, I had to buy only the finest quality ingredients. So off to Whole Foods I went. Two pounds of Callebaut later, and thirty dollars lighter (well I guess I wasn't thirty dollars lighter - thanks Mom), I was in my kitchen, and ready to conquer the chocolate cake.


Double Chocolate Layer Cake

I was surprised at the amount of hot coffee the recipe called for. I definitely didn't want a mocha-flavored cake, so that made me nervous. I couldn't have been more wrong. The coffee brought out a depth of flavor from the chocolate that I had never tasted before. And that chocolate. I will never go back to Ghirardelli again. The original called for semisweet. But I could only find bitter and milk, so I bought both and combined the two. The end result was truly amazing. Moist, tender crumbs, sandwiched by a rich chocolate ganache. The flavors were beyond complex. And the debate we had on our hands? Long forgotten.

Double Chocolate Layer Cake


Double Chocolate Layer Cake
Adapted from Epicurious via Gourmet, March 1999

Cake Layers
3 ounces fine-quality semisweet chocolate (I used milk chocolate Callebaut)
1 1/2 cups hot brewed coffee
3 cups sugar
2 1/2 cups all-purpose flour
1 1/2 cups unsweetened cocoa powder (not Dutch process)
2 teaspoons baking soda
3/4 teaspoon baking powder
1 1/4 teaspoons salt
3 large eggs
3/4 cup vegetable oil
1 1/2 cups well-shaken buttermilk
3/4 teaspoon vanilla

Ganache Frosting
1 pound fine-quality semisweet chocolate (I used a combo of milk and bittersweet Callebaut)
1 cup heavy cream
2 tablespoons sugar
2 tablespoons light corn syrup
1/2 stick (1/4 cup) unsalted butter


Make Cake Layers
Preheat oven to 300°F, and grease two 10-inch round cake pans. Line bottoms with rounds of wax paper and grease paper.

Finely chop chocolate and in a bowl combine with hot coffee. Let mixture stand, stirring occasionally, until chocolate is melted and mixture is smooth.

Into a large bowl sift together sugar, flour, cocoa powder, baking soda, baking powder, and salt. In another large bowl with an electric mixer beat eggs until thickened slightly and lemon colored (about 3 minutes with a standing mixer or 5 minutes with a hand-held mixer). Slowly add oil, buttermilk, vanilla, and melted chocolate mixture to eggs, beating until combined well. Add sugar mixture and beat on medium speed until just combined well. Divide batter between pans and bake in middle of oven until a tester inserted in center comes out clean, 1 hour to 1 hour and 10 minutes.

Cool layers completely in pans on racks. Run a thin knife around edges of pans and invert layers onto racks. Carefully remove wax paper and cool layers completely. Cake layers may be made 1 day ahead and kept, wrapped well in plastic wrap, at room temperature.

Make Frosting
Finely chop chocolate. In a 1 1/2- to 2-quart saucepan bring cream, sugar, and corn syrup to a boil over moderately low heat, whisking until sugar is dissolved. Remove pan from heat and add chocolate, whisking until chocolate is melted. Cut butter into pieces and add to frosting, whisking until smooth.

Transfer frosting to a bowl and cool, stirring occasionally, until spreadable (depending on chocolate used, it may be necessary to chill frosting to spreadable consistency).

Spread frosting between cake layers and over top and sides. Cake keeps, covered and chilled, 3 days. Bring cake to room temperature before serving.

Double Chocolate Layer Cake

3.20.2009

Martha's Mac & Cheese

Martha's Mac & Cheese

Did You Know? Kraft introduced its famous boxed version of macaroni and cheese in 1937. During the first year, nine million boxes were sold. Today, Kraft sells more than one million boxes of its macaroni and cheese every day.

My grandmother is here, visiting from Florida, and for as long as I can remember, her macaroni and cheese has been the meal I request most from her. She is the best cook I know, and I love when she comes to visit so I can pick her brain for ideas. When we would visit her in Florida over our Summers, she would slave over a hot stove, preparing a Thanksgiving feast in the middle of August. First introducing me to chocolate peanut butter, and always ending our days with bon bons, the memories she brings with her always incorporate delicious food. She has been the best grandmother, so I wanted to make her a special dinner after her long flight.

Racking up well over ten thousand comments web-wide, this macaroni and cheese had to be great, if not only for the fact that it's Martha Stewart's favorite. Hoping to give my Mema something as tasty as she gives me, I gave it a go, and was oh so glad I did. Known as the $40.00 macaroni and cheese around the MSO offices, you definately don't want to skimp on the cheeses here. And although I don't think it will cost you quite as much as the name implies, cheese can get quite expensive. But this is a dish for a crowd, so halve it if there's only a few in your family.


Martha's Mac & Cheese

Rich, creamy, and delicious, the sharp cheeses provide so much flavor to this classic American dish. The buttery, crouton-like breadcrumbs offer a crunchy contrast to the smooth shells. I had my Dad grate the cheese for me while I started the roux, and when I turned around to see the outcome, all I could see were mountains of cheddar conceiling what once was the face of my father. So if your one of those people who like to eliminate calories wherever you can, I don't suggest you make this. This dish is for the cellulite embracers among us. Although you could put up an argument for the calcium content if you need to. But you're not kidding me.

Martha's Mac & Cheese


Martha's Mac & Cheese
Adapted here from The Martha Stewart Living Cookbook: The Original Classics

8 tablespoons (1 stick) unsalted butter, plus more for casserole
6 slices white bread, crusts removed, torn into 1/4- to l/2-inch pieces
5 1/2 cups whole milk
1/2 cup all-purpose flour
2 teaspoons coarse salt, plus more for water
1/4 teaspoon ground nutmeg
1/4 teaspoon freshly ground black pepper
1/4 teaspoon cayenne pepper
4 1/2 cups (about 18 ounces) grated sharp white cheddar cheese
2 cups (about 8 ounces) grated Gruyère
1 pound elbow macaroni (I used shells)

Preheat oven to 375°F. Butter a 3-quart casserole dish; set aside. Place the bread in a medium bowl. In a small saucepan over medium heat, melt 2 tablespoons butter. Pour the melted butter into the bowl with the bread, and toss. Set the breadcrumbs aside.

Warm the milk in a medium saucepan over medium heat. Melt the remaining 6 tablespoons butter in a high-sided skillet over medium heat. When the butter bubbles, add the flour. Cook, whisking, 1 minute.

While whisking, slowly pour in the hot milk a little at a time to keep mixture smooth. Continue cooking, whisking constantly, until the mixture bubbles and becomes thick, 10 to 12 minutes.

Remove the pan from the heat. Stir in salt, nutmeg, black pepper, cayenne pepper, 3 cups cheddar cheese, and 1 1/2 cups Gruyère; set the cheese sauce aside.

Cover a large pot of salted water, and bring to a boil. Cook the macaroni until the outside of pasta is cooked and the inside is underdone, 3-5 minutes. Transfer the macaroni to a colander and drain well. Stir the macaroni into the reserved cheese sauce.

Pour the mixture into the prepared casserole dish. Sprinkle the remaining 1 1/2 cups cheddar cheese, 1/2 cup Gruyère, and the breadcrumbs over the top. Bake until golden brown, about 30-35 minutes. Transfer the dish to a wire rack for 5 minutes; serve.

Martha's Mac & Cheese

On another note, Happy Great American Meatout Day! Embrace your inner vegetarian, and go meat-free today!

3.17.2009

Irish Soda Bread

Irish Soda Bread

Did You Know? Legend has it that folks carved a cross on soda bread to "let the devil out" while it's baking for good luck, and others say that it made it easy to divide into 4 pieces. It was also a symbol for a cross during Christian holidays.

While not the traditional Irish soda bread, I've included raisins in mine, turning it into something called "Spotted Dog" or "Railway Cake." If you want to make a truly authentic soda bread, the recipe simply calls for flour, buttermilk, baking soda, and salt. The caraway seeds and plump raisins in this recipe drew me in, so this is what you see today.

St.Patrick's Day has never been a big holiday in my house, but being on Spring Break has left me with extra time to bake, so I thought I would start the tradition of soda bread eating this year. Turns out, it might make a more frequent appearance on my kitchen table. It's good, really good.


Irish Soda Bread

Taking on the taste of rye, but with a much crumblier texture, this traditional Irish staple was by far the easiest bread I've ever made. Sudded with sweet, plump raisins, the only thing difficult about this bread was slicing it. After the initial chop, the remainding slices pretty much all broke in half. Nothing a little butter couldn't piece back together. Happy St.Patrick's Day!


Irish Soda Bread
Adapted from the March 2009 Issue of Martha Stewart Living

1 1/3 cups whole milk
1/3 cup apple-cider vinegar
3 1/2 cups all-purpose flour, plus more for surface and dusting
2 1/2 teaspoons coarse salt
1 teaspoon baking powder
1 teaspoon baking soda
4 tablespoons (2 ounces) cold unsalted butter, cut into small pieces
1 cup unprocessed wheat bran
1/4 cup caraway seeds
1 cup (5 ounces) raisins

Preheat oven to 350 degrees. Line a baking sheet with parchment. Mix milk and vinegar in a small bowl, and let stand until thickened, about 5 minutes.

Whisk together flour, salt, baking powder, and baking soda in a large bowl. Cut in unsalted butter with a pastry cutter or 2 knives (I used a fork) until mixture resembles coarse meal. Add bran, caraway seeds, and raisins; stir to distribute.

Pour milk mixture into flour mixture; stir until dough just holds together but is still sticky. Turn dough onto a well-floured surface (I found the dough to be quite sticky, so I added an additional 1/2 cup of flour to the recipe above). Pat and press the dough gently into a round, dome-shaped loaf, about 7 inches in diameter. Transfer to prepared sheet.

Lightly dust top of loaf with flour. With a sharp knife, cut an X into the top, 3/4 inch deep. Bake, rotating halfway through, until loaf is golden brown and a tester inserted in the center comes out clean, about 1 hour and 15 minutes. Let cool on a wire rack. Soda bread is best eaten the day it is made; serve with salted butter.


3.14.2009

Caramelized Onion Quiche and the Winners!

Caramelized Onion Quiche

Did You Know? In 1987 Larry Shaw at the San Francisco Exploratorium started thinking about “rotation into another dimension”, which coincidentally is what pi (3.14...) describes: the relationship between two dimensions. Shaw and his colleagues built a pi shrine that displayed the first 100 digits of pi, walked in a circle around it and ate pie. Later, Shaw’s daughter discovered that 3/14 aligned with Einstein’s birthday and the popularity of Pi Day grew from there.

So, in honor of Pi Day, I bring you a quiche. Close enough, right? Ever since my last quiche, my sister and Caitlin have requested this brunch favorite on a pretty regular basis. I made this particular version when we had lunch at my uncle's house a few weeks back (the lunch that included the flan). It was a huge success, but it was eaten so quickly, I never had a chance to snap some pictures of the final product. Which leads us to this weekend, and a recreation of the familiar caramelized onion quiche, to comfort us after a long night of dancing.

My uncle Leo, and his band "One Good Guy," were performing at East Bay in Plymouth, and he needed a big crowd to cement a recurring spot for the Summer months (sign his email list to help out the cause). We rallied up the neighborhood, and made an awesome Saturday night out of it. It was so much fun, and the band was great, dropping hit after hit, after hit. Not getting home until a little after 2, we all slept in later than usual. Promising a quiche sometime over the weekend, I figured this was my last chance to keep my word. So a little while later, I presented a quiche.


Slicing Onions into Wedges

I always caramelize way more onions than the recipe probably calls for, but we all love onions, so why not? I just find that I usually end up with some leftover egg and milk, which is perfect for some scrambled eggs or omelets the next morning. Because of my onion overload, this quiche is little more along the lines of an onion pie, rather than a quiche, and a lot less eggy, which I love. If you want more of a custard base, leave out an onion or so. Quiche's are pretty adaptable, so feel free to experiment with the ingredients. My brother begged for some bacon, but come on, does he know who he's talking to?

Caramelized Onion Quiche


Caramelized Onion Quiche
Adapted from Elise of Simply Recipes

Pate Brisee (1/2 recipe)
2 tablespoons olive oil
3 large sweet onions, sliced into wedges (attached at root end-see pictures or tutorial in original recipe seen here)
Salt and Pepper
1-2 tablespoons balsamic vinegar
1 cup milk (I used 1%)
3 large eggs
Pinch nutmeg
1 1/2 cups Gruyère cheese, grated (about 6 oz)

On a lightly floured surface, roll dough into a 12-inch circle. Fit into a 10-inch round tart pan, pressing dough into corners. Transfer to freezer to chill for 30 minutes.

Preheat oven to 350°.

Line pastry with aluminum foil, pressing into the corners and edges. Fill at least two-thirds with baking weights (I use uncooked rice). Bake first for 15 minutes, remove from oven and let cool a few minutes. Carefully remove aluminum foil and weights. Poke the bottom of the pastry with a fork and return to the oven to bake an additional 10-12 minutes, or until lightly golden. Transfer to a wire rack to cool while making the filling.

Heat olive oil in a large, heavy-bottomed sauté pan on medium heat. Add the onions and sprinkle with salt. Cover, and cook for about 10 minutes, until the onions have softened and are translucent. Uncover, reduce the heat to medium low, and cook for an additional 40 minutes, stirring occasionally, until the onions are well browned. Add the balsamic vinegar and cook for 10 minutes more, until the onions are completely caramelized, and a rich mahogany. Remove from heat.

Place tart pan on a baking sheet to catch any spills. Sprinkle half the cheese evenly over the bottom of the crust. Spread the onions over the cheese. In a medium bowl, whisk together the milk and eggs. Season with nutmeg, salt, and pepper. Pour over onions. Sprinkle with the remaining cheese. Transfer to oven, and bake until just set in the center, 30 to 35 minutes. Cool on a wire rack for about 10-15 minutes before slicing.

*Make Ahead: I made the entire quiche the day before, let cool, and stuck in the fridge. I reheated it the next afternoon in the oven for a quick brunch.

Caramelized Onion Quiche


WINNERS!

The winners of the Matt's Munchies fruit leathers have been chosen! Using the Random Integer Generator from Random.org, I entered 1-43 (#of comments), and they picked two random numbers to win the Matt's Munchies. Here's what the screen looked like...

Random Integer Generator
Here are your random numbers:
38 24
Timestamp: 2009-03-14 13:27:09 UTC

Congratulations Jodye (of Couple of Vegans) and Hannah (of Bittersweet)! Shoot me an e-mail with your address! In other freebie news, An Apple a Day is having a Pure Bar giveaway, so check it out, and try your luck there too! (Ends the 17th...St.Patrick's Day)


3.07.2009

Product Review & Giveaway: Matt's Munchies

Matt's Munchies

I was recently contacted by Diana of Matt's Munchies, in hopes of posting a product review on Buff Chickpea. Free food? Why not. So that's what you have here today, my first official product review. Matt's Munchies, a division of snacks from Chef Roberts, is based out of Cedarhurst, NY, and consists of a line of all-natural fruit leathers. Think fruit roll up, but without all the junk. They're gluten, nut, dairy, soy, and egg free. Certified vegan and kosher parve, Matt's Munchies are packed with only pure and natural ingredients. All six flavors are either mango or banana based, and all are under 100 calories. As for the flavor? Delicious! Unlike similar products, these are sweet, but not overly so. You can actually see flecks of real fruit in the thinly rolled out leather. They have a wonderfully smooth texture, and a nice chewy bite. I would love to try incorporating some of these into a baked good, or maybe in some homemade ice cream. And I bet the ginger zest one would be fabulous steeped in water and consumed tea-style, or sliced stick-thin and sprinkled over stir-fry. To give you a better idea of what Matt's Munchies are all about, here's a breakdown of each flavor (scroll to the end for the giveaway)...


Matt's Munchies

Choco-Nana

If you can imagine strolling through Disney World chowing down on a frozen, chocolate-covered banana, then you can imagine eating the Choco-Nana flavor.
Ingredients: Banana puree, semi-sweet chocolate (vegan), organic chocolate concentrate


Apple Pie

For not containing any apple what-so-ever, this variety surprisingly tastes a lot like the Thanksgiving pie of the same name.
Ingredients: Banana puree, organic cinnamon


Banana

Like a fresh-out-of-the-oven slice of banana bread, this flavor is almost begging to be topped with some chocolate almond butter, or maybe that's just me.
Ingredients: Banana puree


Mango

You could drive to your nearest Thai restaurant for a mango lassi, or just chew on one of these. I'm thinking the latter is a little more realistic, for your wallet and your waistline.
Ingredients: Organic mango puree


Island Mango

For someone who hates the texture of coconut flakes, this was absolutely my favorite flavor, and it's loaded with real coconut flakes! I felt like I was lounging in a beach chair, and sipping on a Pina Colada.
Ingredients: Organic mango puree, organic coconut flakes, natural organic coconut flavorings


Ginger Zest

A less harsh version of the Asian ginger chew candy, which can sometimes be a little too spicy for me. Also great for digestion.
Ingredients: Organic mango puree, organic ginger powder


Matt's Munchies


GIVEAWAY!

Now I couldn't just tell you all about this fabulous product without a little sample to back it up. So for two of you lucky friends, I'll be sending some Matt's Munchies your way! All you have to do is leave a comment on this post explaining what you think there next flavor should be. Be creative, I can't wait to read your ideas! You have from now until next Friday, the 13th, so get thinking!

3.03.2009

Pecan-Praline French Toast

Pecan-Praline French Toast

Did You Know? French toast was created by medieval European cooks who needed to use every bit of food they could find (including day-old bread) to feed their families. The term "french toast" first appeared in print in the Encyclopedia of American Food and Drink in 1871.

As I've mentioned before, most Sundays at my house begin with a family-style breakfast. My sister and I are usually home from school for the weekend, along with my brother and his girlfriend, Caitlin. It's one of my favorite parts about coming home from school. We laugh, we eat, and there's always way too many cooks in the kitchen.

Caitlin loves watching me cook and photograph for Buff Chickpea. She loves browsing through other food blogs, in hopes of recreating something that has sparked her interest. This particular recipe is her first (of many) contribution to Buff Chickpea. And although it took some coaxing to get her to make it completely on her own, the result could not have been better.


Pecan-Praline French Toast

A warm, bread pudding-like base, and glazed in a sugary-pecan coating, this french toast took the ordinarly soggy breakfast to new heights. The bread itself was soft, but not overly so. The moisture level was spot on, and the crispy topping worked wonderfully against the custard base. Served with warmed maple syrup, and a dusting of powdered sugar, a second piece will be calling you shortly. Thanks Cait!

Pecan-Praline French Toast

Pecan-Praline French Toast
Adapted from Smitten Kitchen

1 loaf Italian bread, cut in 1" thick slices
3 cups whole milk
3 eggs
2 tablespoons white sugar, plus additional for sprinkling
2 tablespoons brown sugar
1 tablespoon cinnamon, plus additional for sprinkling
1/2 teaspoon salt
1 teaspoon vanilla extract
1 teaspoon almond extract

Praline Topping
Adapted from Paula Deen

1 stick butter, slightly softened
1 cup packed brown sugar
1 cup chopped pecans
2 tablespoons golden syrup (or light corn syrup)
1/2 teaspoon ground cinnamon
1/2 teaspoon ground nutmeg


The Night Before
Liberally grease a 9×13-inch baking dish with butter, and sprinkle with 1 tablespoon of white sugar.

Arrange bread in the pan in two tightly-packed layers. Make sure to fill in any spaces with torn pieces of bread, so that the custard does not leak to the bottom.

Whisk the milk, eggs, remaining sugars, cinnamon, salt and extracts, and pour over the bread. Sprinkle with additional cinnamon and sugar.

Wrap tightly with plastic wrap and refrigerate overnight. The bread will absorb all of the sugary custard while you catch up on your zzz's.

The Next Morning
Make the praline topping: Combine all ingredients in a medium bowl and mix well. Spread over french toast.

Bake at 425 for 30 minutes, or until puffed and golden.

Cut into generous squares and serve with maple syrup and powdered sugar.


Pecan-Praline French Toast

THANK YOU

On a side note, I just wanted to send a HUGE thank you to Julia of Dozen Flours for generously sending a sweet 'n salty candy apple my way over the weekend. It was completely devoured within minutes of arrival, and held to high acclaims from everyone in my household. Declared as the best candy apple ever eaten, I'll have to try my hardest on my next dessert to win them back. Thanks Julia, for having such a giving spirit and kind heart.


Back to Top